After my friends canceled our weekend plans, I was looking for something to kill time. I finally ended up with a plan to create a portfolio website after going through my long pending list of ‘Wish-To-Do’things.
Many hours of searching for technologies and templates later, I ended up creating this website using React.js and deploying it using Github pages. You can find the code for the website here (It’s called a ‘web-app’ technically, but for this article, I will be referring to it as a ‘website’ … I hope that’s ok).
What you will learn
Some basic concepts of React.js
How to use create-react-app from an HTML website
How to deploy your portfolio website using ‘Github pages’
Some concepts you need to know before we start ..
Note — feel free to skip this part if you are already familiar with basic concepts of React.js and React Components.
These points will provide a very basic idea of the React world. I highly recommend you to study more about React from the documentation and get hands-on with the help of freeCodeCamp.
What is React.js >
For now, it is enough to know that React.js is the JavaScript library used for building UI components. It was created by the engineers of Facebook and nowadays, it is rocking the JavaScript world..
What is a React Component >
React lets you define components as a class or a function. You can provide optional inputs to the components called ‘props’.
Components let you split up the UI into independent sections like header, footer, and body. Each component will work independently so any individual component can be rendered independently into the ReactDOMwithout affecting the whole page.
It also comes with ‘lifecycle methods’ which let you define pieces of code you want to execute according to the state of the component like mounting, rendering, updating and un-mounting.
React components come with their own trade-offs. For example, we can reuse a component by exporting it to other components, but sometimes it gets confusing to handle multiple components talking and triggering renders for each other.
this is how a component would look like!
import React,{ Component }from'react'exportdefaultclassComponent-name extendsComponent{render(){return(<div>{these code will be rendered into the DOM}</div>)}}
With GitHub Pages, you can easily deploy your site using GitHub for free and without the need to set up any infrastructure. They have provided modules so that you don’t have to worry about many things. If you stick around till the end you’ll see that it works like MAGIC!
Before you go ahead make sure to ..
Decide what content you want to put up on your website
Go through your latest resume once (if you don’t have one then create one now and postpone this project until next weekend ?). It will help you to have a clear idea about what kind of information you want to put on your portfolio website.
Find inspiration
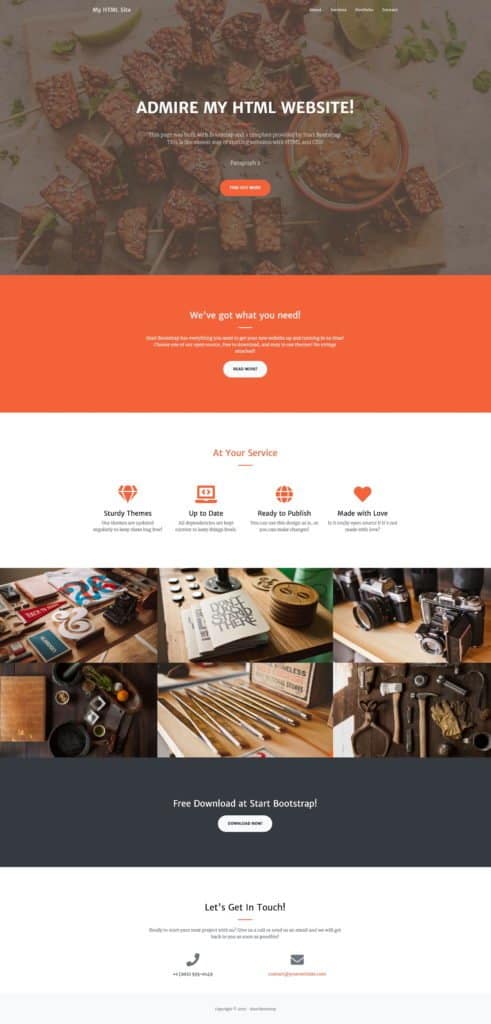
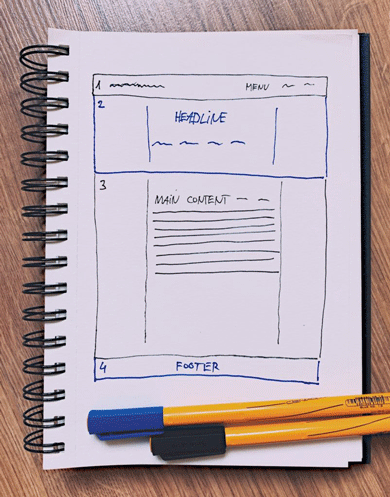
Browse through the hundreds of free portfolio website templates on the web, see how and what you can use from them — take out a pen and paper and sketch out a rough diagram to get an idea of what your website will look like. I will be using this template to demonstrate.
Gather some amazing pictures of yourself
Of course you don’t want to look bad on your own portfolio website. So dig into your archives of photos to find the perfect photos for your website.
Tune into your favourite playlist
Legend has it that good things come only with good music… and you surely don’t want to miss out on any great things.
In the following sections, I will describe steps to building the portfolio app but you don’t have to follow the same code I use. Focus on learning the concepts and show some creativity! Further reading has been divided into three sections.
Setting up the React-app
Breaking down the HTML page into React components
Deploying your app onto Github pages
Setting up React-app
We will be using create-react-app — a module provided by Facebook — which helps us to create React.js apps with ease and without worrying about build tools.
Go to the console and run npm install create-react-app to install this module via npm (make sure that you have installed npmbefore using it — follow this link for more info).
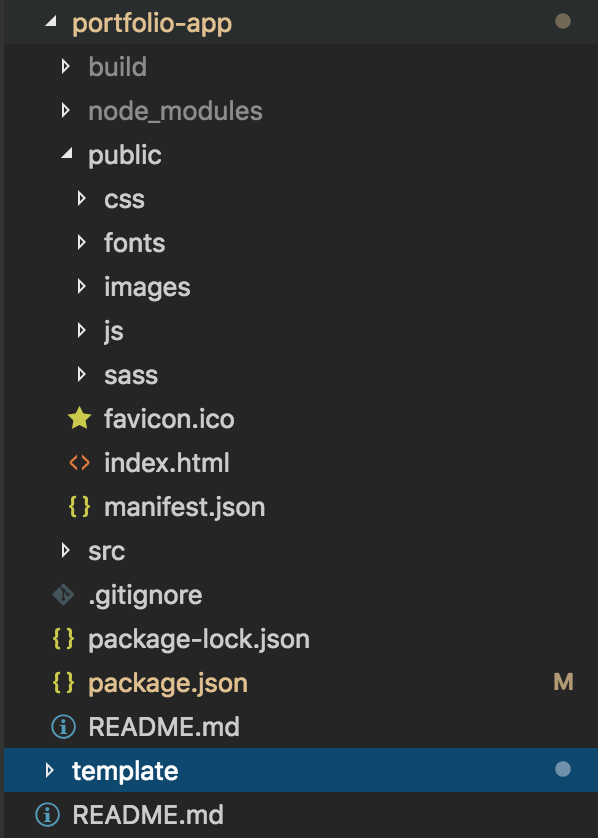
Now run npm create-react-app ${project-name} which will fetch build scripts and create a file-structure which will look like this.
my-portfolio-app
├── README.md (description of the project for GitHUb)
├── node_modules (stores all dependent modules for the project)
├── package.json (stores all meta information of the prokect like dependencies,version,revisions etc.)
├── .gitignore (files declared here will be ignored while uploading to GitHub like node_modules
├── public (here you will store all images,JS,CSS files)
│   ├── favicon.ico
│   ├── index.html
│   └── manifest.json
└── src (our main code for app lies here)
├── {create component folder here}
├── App.css
├── App.js
├── App.test.js
├── index.css
├── index.js
├── logo.svg
└── serviceWorker.js
Create a components folder under the src directory. This is where we will store our components in the future.
Copy all the images, fonts, HTML and CSS files from the HTML template you decided to work with into the public folder.
Now your project directory should look like this.
file-structure
Run the npm install command which will install dependent modules under node_module directory.
If you’ve got it right up until now, then running the npm start command will start the React app on the localhost. Go to https://localhost:3000and you should be able to see the starter page of the React-app.
Breaking-down the HTML page into React components..
Remember the component folder which we created under src directory in the previous step, now we will break down the HTML template page into components and combine these components to make our React-app.
First, you need to identify which components you can create from the monolithic HTML file — like header, footer and contact me. You need to be a little creative here!!
Look for tags like section/div which aren’t nested into some other section/div. These should contain code about that particular section of the page which is independent of other sections. Try looking into my GitHub Repo to get a better idea about this one. Hint: Use the ‘inspect element’ tool to play around with the code and take notice of the effect of changes within the browser.
These pieces of HTML code will be used in the render() method of the component. The render() method will return this code whenever a component gets rendered into the ReactDOM. Take a look at the code blocks given below for reference.
<sectionid="colorlib-hero"class="js-fullheight"data-section="home"><divclass="flexslider js-fullheight"><ulclass="slides"><listyle="background-image:url(images/img_bg_1.jpg);"><divclass="overlay"></div><divclass="container-fluid"><divclass="row"><divclass="col-md-6 col-md-offset-3 col-md-pull-3 col-sm-12 col-xs-12 js-fullheight slider-text"><divclass="slider-text-inner js-fullheight"><divclass="desc"><h1>Hi! <br>I'm Jackson</h1><h2>100% html5 bootstrap templates Made by <ahref="https://colorlib.com/"target="_blank">colorlib.com</a></h2><p><aclass="btn btn-primary btn-learn">Download CV <emclass="icon-download4"></em></a></p></div></div></div></div></div></li><listyle="background-image:url(images/img_bg_2.jpg);"><divclass="overlay"></div><divclass="container-fluid"><divclass="row"><divclass="col-md-6 col-md-offset-3 col-md-pull-3 col-sm-12 col-xs-12 js-fullheight slider-text"><divclass="slider-text-inner"><divclass="desc"><h1>I am <br>a Designer</h1><h2>100% html5 bootstrap templates Made by <ahref="https://colorlib.com/"target="_blank">colorlib.com</a></h2><p><aclass="btn btn-primary btn-learn">View Portfolio <emclass="icon-briefcase3"></em></a></p></div></div></div></div></div></li></ul></div></section>
‘home’ section of the HTML file
import React,{ Component }from'react'exportdefaultclassHomeextendsComponent{render(){return(<div><sectionid="colorlib-hero"className="js-fullheight"data-section="home"><divclassName="flexslider js-fullheight"><ulclassName="slides"><listyle={{backgroundImage:'url(images/img_bg_1.jpg)'}}><divclassName="overlay"/><divclassName="container-fluid"><divclassName="row"><divclassName="col-md-6 col-md-offset-3 col-md-pull-3 col-sm-12 col-xs-12 js-fullheight slider-text"><divclassName="slider-text-inner js-fullheight"><divclassName="desc"><h1>Hi! <br/>I'm Jackson</h1><h2>100% html5 bootstrap templates Made by <ahref="https://colorlib.com/"target="_blank">colorlib.com</a></h2><p><aclassName="btn btn-primary btn-learn">Download CV <emclassName="icon-download4"/></a></p></div></div></div></div></div></li><listyle={{backgroundImage:'url(images/img_bg_2.jpg)'}}><divclassName="overlay"/><divclassName="container-fluid"><divclassName="row"><divclassName="col-md-6 col-md-offset-3 col-md-pull-3 col-sm-12 col-xs-12 js-fullheight slider-text"><divclassName="slider-text-inner"><divclassName="desc"><h1>I am <br/>a Designer</h1><h2>100% html5 bootstrap templates Made by <ahref="https://colorlib.com/"target="_blank">colorlib.com</a></h2><p><aclassName="btn btn-primary btn-learn">View Portfolio <emclassName="icon-briefcase3"/></a></p></div></div></div></div></div></li></ul></div></section></div>)}}
React component created from the ‘home’ HTML section
Hint: If things are getting confusing on the react side — try focusing on the concept of ‘how to identify wanna be components from the HTML codebase’. After getting comfortable with React, implementation will be a piece of cake.
Did you notice that there are some changes in the HTML code? class became className. These changes are required because React doesn’t support HTML ? — they have come up with their own HTML-like JS syntax which is called JSX . So, we need to change some parts of the HTML code to make it JSX.
I bumped into this HTML to JSX converter during this project, which converts HTML code into JSX for you ?. I highly recommend using this rather than changing your code manually.
After some time, you should come up with some different components. Now the EndGame is near!! Combine these different components under one App.js component (YES!! You can render one component from another component!) and your portfolio app will be ready.
import React,{ Component }from'react';import'./App.css';import Sidebar from'./components/sidebar'import Introduction from'./components/introduction'import About from'./components/about'import Projects from'./components/projects'import Blog from'./components/blog'import Timeline from'./components/timeline'classAppextendsComponent{render(){return(<divid="colorlib-page"><divid="container-wrap"><Sidebar></Sidebar><divid="colorlib-main"><Introduction></Introduction><About></About><Projects></Projects><Blog></Blog><Timeline></Timeline></div></div></div>);}}exportdefault App;
combined all components under app.js
Notice in the above code that we need to first import the components in order to use them in the render() section. And we can use the components just by adding <component-name></component-name>or just <component-name/> tag in the render method.
Run npm start from your terminal and you should be able to see the changes reflected in the website. You don’t need to run this command again if you have made more changes in the code, it will be reflected automatically when you save those changes. You can do some lightning fast development thanks to the hot reload feature.
Play around with the HTML and CSS to change the content according to your resume and make your portfolio even cooler by changing the content, trying out different fonts, changing the colours and adding photos of your choice.
Deploy React-app to Github pages
Okay, so you survived until this point… take a moment to appreciate your hard work. But you still need to complete your deployment so that you can share your cool work with your friends who ditched those weekend plans.
First, you need to install the npm library of Github pages. To install, run this command npm install gh-pages on your terminal.
Now, you need to make the following changes in your manifest.json file:
Now go to the terminal, run npm run deploy and wait for the magic!! Your app will be deployed after the deployment scripts execute successfully. Verify whether your app has deployed or not by visiting the link you provided in the homepage field.
Caution: Please be careful when deploying anything onto the web. Perform safety checks like removing internal links, passwords, or anything that you don’t want to be there in the hands of smart people out there.
If you are going to make changes often...
Note — You need to perform the deployment stage every time you change something and if you are making changes in the codebase - guess what whose going to get bored soon !! ( No worries I got your back :P)
You can automate the deployment process using Travis-CI (automation tool), so that if you commit anything into master branch – the deployment steps will be triggered and new site will be automatically available. Follow this article for that.
Congratulations! You have finally created and deployed your portfolio app. If you are interested, then you can add these features to your website
Blog feature: create your own blog using Node.js and a NoSQL database like MongoDB and merge it into this portfolio website.
Gallery: add a section to the page where you can show the screenplay of the recent photos from your social media websites.
Twitter Feed: add a section showing recent tweets by you.
Random Quote: add a section showing some random motivational quotes.
If you implement any of these features, share your work with me. I would be more than happy to help ? ( if I can ?)
Wrapping up ..
Web Dev through VUE.js
In this free book, we will build two simple projects and deploy them on Netlify. We will use Vue.js as our front-end framework, and use different technologies to build our projects.
If you follow this tutorial to the end, you will build a simplified version of Twitter and a single page application for a portfolio using the GitHub API.
What you need to know to follow this tutorial
To follow along, you will need at least some basic knowledge of HTML, CSS, and JavaScript.
Knowledge of Vue.js isn't required, as you will learn the basics first and then we'll move into building the projects together.
At the end of each section, you'll find that information in video form via a YouTube link/embed. That way you can watch the videos to cement your knowledge of what you just read.
VueJS is a JavaScript framework that has become really popular in recent years.
In this guide, we will start by looking at the fundamentals first, with a quick look at two libraries: VueRouter and Axios. We will use them to build a cool portfolio project at the end.
You can use Vue in your projects by installing it using a package manager like NPM or by using its CDN. If you've never used Vuejs before, I suggest that you use the CDN, as it will be easier if you want to code along with me.
Click to view the YouTube-Video or find it at the end of this section to reinforce what you've learned.
The Vue CDN
For the CDN, we only need to include the script tag below inside our HTML file:
<!-- Development version for prototyping and learning --><scriptsrc="https://cdn.jsdelivr.net/npm/vue@2.6.12/dist/vue.js"></script>
Alternatively, you can use a production-ready script that uses a specific stable release, like this:
<!-- Production version --><scriptsrc="https://cdn.jsdelivr.net/npm/vue@2.6.12"></script>
In production, Vue suggests using the optimized version to replace vue.js with vue.min.js.
There is also an ES Modules-compatible build:
<scripttype="module">
import Vue from 'https://cdn.jsdelivr.net/npm/vue@2.6.12/dist/vue.esm.browser.js'
</script>
How to Install Vue via NPM
If you plan to build large scale applications, I recommend installing via NPM like this:
npminstall vue
As I said above, we will use the Vue CDN so that anyone can follow this guide. So our final HTML file will look something like this:
<!DOCTYPE html><htmllang="en"><head><metacharset="UTF-8"><metaname="viewport"content="width=device-width, initial-scale=1.0"><title>VueJS Tutorial</title><!-- vue development version, includes helpful console warnings --><scriptsrc="https://cdn.jsdelivr.net/npm/vue/dist/vue.js"></script></head><body><scriptsrc="./main.js"></script></body></html>
Let's break this code down. First, we've add a basic markup for an HTML file. Then we've included the script tag for the VueJs framework.
In the end, before closing the body tag, we've added our main.js script where we placed all the JavaScript code for our application.
Let's now move to the next step and add our first Vue instance inside the main.js file.
How to Create a Vue Instance
Once you've installed Vue or included it via its CDN, you can create a Vue instance. You can do that using the new Vue() function. This function accepts an object of options.
If you read the documentation, you will see that the vue instance is often stored inside a variable called vm, but you can call it anything you like. I'll call it app during this guide.
So now, inside the main.js file you need to create a variable and store in it the Vue instance like so:
let app =newVue({// all options goes here})
The object you pass to the Vue instance is called the options object.
Inside the options object, you can add all the options described in the Vue API reference pages to build our application.
The options object has properties divided into multiple sections:
Data
DOM
Life Cycle Hooks
Assets
Composition
Misc categories
The first property that you need to build you Vue application is used to connect Vue with a root DOM element. Then you will need some data options to work with.
Let's start by connecting the Vue instance with a root DOM element.
And you can click to view the YouTube-Video or find it at the end of this section so you can review what you've learned.
Options/DOM: How to select the root DOM element
The Options/DOM API gives you an el property that you can use to select an existing DOM element that Vue will use to mount your application instance.
The el property accepts a string that contains a CSS selector for the element or directly a DOM element.
NOTE: Vue discourages using the body or HTML tags and suggests using a different element as a mounting point.
Let's do it. Inside the body of the index.html file, you need to put the following code:
<divid="app"></div>
Now you have a root element that you can use to connect the Vue instance.
Back inside the main.js file, let's select this element inside the options object.
You can now use the el property to select the element you created with an id of app.
let app =newVue({// all options go here
el:"#app",})
You now have an element to work with. You can move on to the next step and add to the options object the data object.
Options/Data: How to add the data object (or function when used in a component)
When a new instance is created, it adds all properties found in its data object to the Vue reactivity system. And when a value in the data object changes, the view will reflect these changes. This is at the base of the VueJS reactivity system.
To explain it, let's see a practical example.
Create a data object
Inside the main.js file you can create a data property that has an object as its value, like so:
let app =newVue({// all options go here
el:"#app",
data:{}})
The data object can be defined directly inside the Vue instance like in the code above, or outside the instance like in the code below.
let dataObject ={}let app =newVue({// all options go here
el:"#app",
data: dataObject
})
You can pick the one you like.
Add properties to the Data Object
Since VueJs is a JavaScript framework, it's helpful to remember that what you know about JavaScript is still valuable here.
Vue is just a JavaScript object that has a number of methods and properties that you can use to simplify and speed up your workflow.
Let's add some properties to the data object to see how it works.
// Create a data objectlet app =newVue({
el:"#app",// create a vue instance, add the data property and the dataObject created
data:{
alert:"This is an alert message! ",
projects:[{title:"portfolio", languages:["HTML","CSS","VueJS"]},{title:"grocery shop", languages:["HTML","CSS","PHP"]},{title:"blog", languages:["HTML","CSS","PHP"]},{title:"automation script", languages:["Python"]},{title:"eCommerce", languages:["HTML","CSS","PHP"]},];}})
With the code above, you simply add two properties to the data object: an alert property and a projects property.
The alert property just a string while the projects property is an array of objects.
Now that you have some data to work with, let's see how you can access and modify their values.
Manipulate properties in the data object
You can access and manipulate the properties of a data object using the variable that contains the Vue instance app. Then you can reference the properties using dot notation, like app.alert.
In the browser, if you open the console you can see that when you write app you get the Vue instance object. So, like any other object with dot notation, you get its properties and methods.
Let's try this out inside the console:
// Access the alert property in the data object
app.alert // This is an alert message!// update a data property value
app.alert ="This is a new alert message!"
app.projects
The code above does three simple things:
the first line accesses the alert property and prints its content "this is an alert message"
the second line assigns a new value to the alert property with the equals operator
finally, the third line returns the value of the projects array.
You can also access the entire data object using the shortcuts $data or _data
Back in the console:
// Access the entrie data object
app.$data // {__ob__: Observer} option 1
app._data // {__ob__: Observer} option 2
The Vue instance gives you access to a number of properties and methods.
You can access default methods and properties using the $ sign. It is used to differentiate Vue defined methods from those defined by the user.
There are a number of instance methods and properties predefined and split into four different categories:
Instance Properties
Instance Methods / Data
Instance Methods / Events
Instance Methods/life cycle hooks
For instance, with the following code, you can get the data and options objects or access the watch or the on methods.
app.$data // returns the data object
app.$options // returns the options object
app.$watch()// function that watched for changes on the vue instance
app.$on()// listen for a custom event on the vue instance
I won't dive deeper into this since it's out of the scope of this guide. But if you are interested and want to learn more, here is the documentation.
Lifecycle Hooks
Vue gives you access to a series of functions called lifecycle hooks. They allow you to run code at specific stages of the Vue initialization steps.
Inside all lifecycle hooks you have access to their this variable that points to the Vue instance.
You will see how this works in more detail in future sections. But for now this is a short summary of the available hooks and what they let you do:
beforeCreate (you can run code before the Vue instance is created)
created (you can run code after the Vue instance is created )
beforeMount (you can run code before your element is mounted to the DOM)
mounted (you can run code when the element is mounted to the DOM)
beforeUpdate (you can run code before values are updated in the DOM)
updated (you can run code after values in the DOM have been updated)
beforeDestroy (you can run code before an instance is destroyed)
destroyed (you can run code when an instance is destroyed)
During the course, we will often use the mounted hook. If you are curious to learn more about this topic, I suggest you look at the diagram in the documentation first. Find the lifecycle Hooks diagram here.
How to Work with Templates in Vue
VueJS uses mustache syntax {{ }} to render data from the Vue instance inside the HTML element.
Using this syntax you can grab properties and methods defined in the Vue instance. The property is then parsed and rendered to the page.
And you can click to view the YouTube-Video here here, or find it at the end of this section to review what you've just learned.
Text Data binding
This is called text data binding. Let's see an example of how you can bind data between the Vue instance and your template file.
<divid="app"><h1>{{ title }}</h1></div>
The code above has an h1 tag inside the root element with an id of app we defined in the previous chapter.
Inside the h1 tag you use the double curly brackets syntax to render onto the page the value of a property in the data object called that you called title.
You don't have a title property yet inside your data object, so let's add it.
Inside the main.js file
let app =newVue({
el:"#app",
data:{
title:"John Doe portfolio",
projects:[{title:"portfolio", languages:["HTML","CSS","VueJS"]},{title:"grocery shop", languages:["HTML","CSS","PHP"]},{title:"blog", languages:["HTML","CSS","PHP"]},{title:"automation script", languages:["Python"]},{title:"eCommerce", languages:["HTML","CSS","PHP"]},]}})
Now, with the code above you can render the content of the property title inside the h1 tag in your template. The final result will be something like this:
<h1>John Doe portfolio</h1>
However, with this method, you can only pass a string. If you want to use HTML tags inside the string these will not be parsed but instead will be shown as simple strings.
For instance if you assign the following string to the title property
title:"John Doe <span class='badge'>Portfolio</span>"
And then try to render it inside our HTML like so:
<h1class="title">{{title}}</h1>
The property title will be rendered as a plain string including the HTML tags
ie. John Doe <span class='badge'>Portfolio</span>
Of course you can parse HTML too.
How to parse raw HTML
To render a raw HTML element we need to introduce another important Vue concept called directives.
In this case, you will use the v-html directive inside your HTML tag as an attribute and pass to it the property title.
When you're using Vue directives, the text inside the quotes is considered a JavaScript expression. This means that it's computed and its result is rendered.
Let's create a separate property for the title with HTML tags inside so that you can see how both render onto the page.
let app =newVue({
el:"#app",
data:{
title:"John Doe Portfolio",
titleHTLM :"John Doe <span class='badge'>Portfolio</span>",
projects:[{title:"portfolio", languages:["HTML","CSS","VueJS"]},{title:"grocery shop", languages:["HTML","CSS","PHP"]},{title:"blog", languages:["HTML","CSS","PHP"]},{title:"automation script", languages:["Python"]},{title:"eCommerce", languages:["HTML","CSS","PHP"]},]}})
Now inside your HTML file, you will use this {{}} syntax to render the property title. But on the tag where you want to render raw HTML, with the titleHTML property, you use the v-html directive instead.
<divid="app"><divclass="title">{{ title }}</div><divv-html="titleHTML"></div></div>
Both elements will now render correctly including the second property that has HTML tags inside.
NOTE: Rendering HTML can expose XSS vulnerabilities. Never use this approach on user-provided content.
Now that you know how to render data onto the page, let's dig deeper into directives.
If you want to read more, visit the documentation here.
Vue Directives
Inside your HTML files, you can use directives to interact with HTML attributes. A directive applies effects to the DOM when its expression changes.
And you can click to view the YouTube-Video here, or you can find it at the end of this section to review what you've learned.
The v-bind directive on HTML attributes
So far, you have used the {{}} syntax to render something between HTML opening and closing tags. But inside an HTML tag you cannot use the {{ }} syntax.
So how do you connect an HTML attribute to the Vue instance? You use the v-bind directive instead which lets you access data object properties as you have done before.
The v-bind directive is one of the directives that take arguments which are specified after the colon. In our case here, what's specified after the colon is the HTML attribute name like id, class, href, src and so on.
If you need to dynamically assign an attribute like href or even a class, you can bind it with the Vue instance using the v-bind directive. It will then be able to get what's in the options object, like properties in the data object.
Let's see v-bind in action and start connecting the id and class attributes so you can assign them values dynamically with Vue.
Inside our index.html file:
<divid="app"><divv-bind:class="dynamicClass"v-bind:id="dynamicId">Dinamically assign a class and an id to the div</div></div>
Let's break the code above and see what it's doing.
First, you have a div tag inside the root element. Then you use the v-bind directive on the class and the id attributes.
Inside the quotes, you specify two properties that later you'll define inside the data object of your Vue instance.
Remember that when using Vue directives the content between quotes is treated as a JavaScript expression.
Let's define these two properties inside the Vue instance.
let app =newVue({
el:"#app",
data:{
title:"John Doe Portfolio",
titleHTLM :"John Doe <span class='badge'>Portfolio</span>",
projects:[{title:"portfolio", languages:["HTML","CSS","VueJS"]},{title:"grocery shop", languages:["HTML","CSS","PHP"]},{title:"blog", languages:["HTML","CSS","PHP"]},{title:"automation script", languages:["Python"]},{title:"eCommerce", languages:["HTML","CSS","PHP"]},],
dynamicId :"projects_section",
dynamicClass :"projects"}})
So you have defined dinamicId: "projects_section" and dynmicClass: "projects" properties and assigned them two values.
Thanks to the data binding on the attributes, your HTML tag will be rendered as follows (and you can now dynamically change your attributes values and see them change reactively):
<divid="projects_section"class="projects">Dynamically assign a class and an id to the div</div>
V-bind with Boolean values
With attributes using a boolean value, the v-bind directive works differently. It will show the attribute only if the property's value is true. In all other cases, it won't render the attribute and its content.
For the next example, you will use a button with the disabled attribute.
Inside your root HTML element:
<divid="app"><buttonv-bind:disabled="disabled">You can't click this button</button></div>
Inside a Vue instance:
let app =newVue({
el:'#app',
data:{//disabled: false, // wont render the attribute//disabled: null, // wont render the attribute//disabled: undefined, // wont render the attribute
disabled:true// renders the attribute}})
Only if the disabled property is set to true does the attribute become visible and render its property content.
<buttondisabled>You can't click this button</button>
This is something to keep in mind when working with such attributes.
Another thing to consider is that bindings can include a single JavaScript expression, with some restrictions:
only expressions are allowed
only a single expression
no statements
no flow control tools, but the ternary operator works.
So far we have seen only two Vue directives, v-html and v-bind. But there are a number of directives available, and here are some more (to list just a few):
v-html
v-bind
v-if
v-else-if
v-else
v-for
v-on
All directives have a v- prefix, but there is shorthand for v-bind (:) and v-on (@).
They work in the same way. Here's a quick reference for the v-bind and v-on directives:
<!-- Long syntax --><av-bind:href="url">Some link</a><!-- Shot syntax --><a:href="url">Some link</a><!-- Long syntax with dynamic arguments --><av-bind:[attribute_name]="url">Some link</a><!-- Shot syntax with dynamic arguments --><a:[attribute_name]="url">Some link</a>
Shorthand for v-on
<!-- Long syntax --><av-on:click="runFunction">Some link</a><!-- Shot syntax --><a@click="runFunction">Some link</a><!-- Long syntax with dynamic arguments --><av-on:[attribute_name]="runFunction">Some link</a><!-- Shot syntax with dynamic arguments --><a@:[attribute_name]="runFunction">Some link</a>
Now let's see what dynamic arguments are and how they work.
Dynamic arguments in Vue
Directives have been able to have dynamic arguments since Vue 2.6.0. You can use a JavaScript expression in the directive argument if you wrap it inside square brackets.
But there are some restrictions:
expressions should evaluate to a string
spaces and quotes are invalid
Let's see a practical example
<av-bind:[attribute_name]="url">Visit my Website</a>
Inside your data object you can define the directive arguments as if they were properties, where the property value is the name of your HTML attribute like hef in the following example:
let app =newVue({
el:'#app',
data:{
attribute_name:'href',
url:'https://fabiopacifici.com'}})
The code above renders the attribute name href and its value dynamically when you bind it using the v-bind directive.
The result will be this:
<a href="https://fabiopacifici.com">Visit my Website</a>
Dynamic events in Vue
You can apply the same concept to event directives like v-on. This directive does the job of the JavaScript event listener.
v-on accepts an argument like click, for example v-on:click="doSomething".
To apply the concept of dynamicity, let's create a v-on directive and use the square brackets after it to specify a dynamic event.
Inside the index.html file you will place the following code:
First you have your root element, the div with an id of app. Inside the root element you add an anchor tag <a>Some link</a>.
The anchor tag has a v-on directive in it. After the directive you specify a dynamic argument v-on:[event_name] where event_name will be a property inside your Vue instance that you can change as you need.
The v-on directive works like any event listener, so between quotes you need to specify the name of the function that you want to run when the event is triggered, therefore runFunction.
Now, inside your main.js file:
let app =newVue({
el:'#app',
data:{
event_name:"click"},
methods:{runFunction(){
console.log("test click function");}}})
Let's review what the code above does.
First, you create the Vue instance. Then you add the event_name property inside the data object and you assign to it a value of click. This is the event you will listen for.
Finally, we said that the v-on directive runs a function when the event is triggered, therefore you need to write a method inside your Vue instance. So inside the methods object, create a new function called runFunction that will simply output a message inside the console.
The power of dynamic events is clear when you replace the value of the event_name property with a different event name.
Methods in Vue
So far we've learned how to bind data using the v-bind directive inside your template. In the next section, you will learn more directives – but before diving into that, let's quickly talk about how to store your functions.
And you can see the video version of this section on YouTube if you want to review what you learn.
Since you are working in a big object, the Vue instance function will take the name of the methods. And as you might guess, the Options object has a property called methods where you can store your functions as you do for your data.
Inside your Vue instance, define a method that you can call anything you like – just remember to use a naming convention that clearly describes your code.
In the code above, you created a method inside the methods object. You called it getFullName. Inside a method, you have access to the this keyword that refers to the object instance, so you can use it to access from a method the properties stored in the data object.
When you call the method getFullName the method will return a single string that contains both the first and the last name.
Now inside your HTML file, you can simply call the method as you did when you needed to access properties in the data object {{ getFullName() }}
<div>{{ getFullName() }}</div>
Now that you know how to create a method and where to put it in the Vue instance, let's move forward and learn more about directives.
Conditionals in Vue (v-if/v-else-if/v-else/v-show)
Now it's time to learn more about directives. We will start by looking at how conditionals work in VueJS. The first directive of this section is the v-if, which allows you to render blocks of code based on a certain condition.
And you can click to view the video on YouTube here or use it to review at the end of the section.
Like the if-else statements in vanilla JavaScript, the v-if will check if the returned value of a conditional expression evaluates to true. If so it will render the HTML element and everything you place inside it.
Since it's a directive, it works on a single element (HTML tag). If you want to extend its behaviour on multiple elements, then you need to wrap them inside a <template> tag.
The v-if directive works in the same way as the v-bind directive works: it has access to the properties in the data object and accepts an expression between its quotes.
If the returned value of the expression or the value of the data property you use evaluates to true, then the directive renders the HTML element. Otherwise it doesn't.
Of course, you can check for multiple conditions and end up rendering an element if none of these evaluates to true. You do that using v-if together with the v-else-if and v-else directives.
Let's see a simple example and write some code inside your main.js file to show or hide an element.
The first thing to note is that if you have a property that returns a boolean value, it is enough to use it inside the v-if directive to show/hide an element, like so:
<h1v-if="showTitle">{{movieTitle}}</h1>
And a vue instance with a showTitle property set to true.
let app =newVue({
el:"#app",
data:{
movieTitle:'Shining',
showTitle:true,}})
In such a case, you are saying show the title property only if the value of showTitle is true. If you change it to false, the title won't show.
You can put a simple expression inside the quotes of a v-if directive that once computed evaluates to a boolean.
<h2v-if="age >= 18">{{movieTitle}}</h2>
Inside your main.js file
let app =newVue({
el:"#app",
data:{
movieTitle:'Shining',
age:18,}})
In the code above we wrote an expression on the v-if directive that checks if the age property is greater than or equal to 18. If the result is true then the h2 will be shown onto the page.
Now let's move to a more complex example and add another condition using the v-else-if.
v-if/v-else-if
In the following example, you will first create a v-if condition similar to the one above – but this time you'll check if the user is over 18 but under 21 using the && operator.
If true, then you'll show the time with an additional note. If false, and the user is over 21, then we will simply show the title of the movie.
<h2v-if="age > 21">{{movieTitle}}</h2><h2v-else-if="age > 18 && age < 21"> {{ movieTitle }} | Watch with an adult</h2>
Inside the Vue instance you could have an age property. But to make your simple program dynamic, you can instead use a prompt to ask the user their age.
let userAge =Number(prompt("What's your age?"))let app =newVue({
el:"#app",
data:{
movieTitle:'Shining',
age: userAge,}})
So the code here first asks the user their age, then stores the result as a number inside the variable userAge.
You'll later use the userAge variable inside the data object to assign a value to the age property so that based on its value you will render one element or the other.
Let's move forward and use the v-else directive to show a different message in case the user is under 18.
v-else directive:
The v-else directive works differently. You don't have to pass it anything. It simply enters into action when none of the previous conditions evaluate to a true value.
So the new HTML element is fairly simple:
<divid="app"><h2v-if="age > 21">{{movieTitle}}</h2><h2v-else-if="age > 18 && age < 21"> {{ movieTitle }} | Watch with an adult</h2><pv-else> Sorry You are too young to see this movie</p></div>
Here we have a p tag with a v-else directive attached. As you can see, it looks like an attribute without values (like the disabled or required HTML attributes).
Your JavaScript file has not changed.
let userAge =Number(prompt("What's your age?"))let app =newVue({
el:"#app",
data:{
movieTitle:'Shining',
age: userAge,}})
That's all you need to know about conditional rendering to be able to move forward with your first project. But if you want to learn more, here is the documentation: [https://vuejs.org/v2/guide/conditional.html]
You need to learn a few more things before you'll be able to build your first project, which is a simplified Twitter clone. The next topic is about Loops.
Loops in Vue
Let's go back to the previous example and learn how to use the v-for directive to output each project of the array onto the page.
And you can click to view the YouTube-Video here, or you can find it at the end of this section to review what you've learned.
For our next task, it would be useful if we could use a loop, and the v-for directive is here to help.
Its syntax doesn't have much in common with a classic for loop in JavaScript, but rather with a Python for in loop or with the for in JavaScript loop used to iterate over objects.
With this directive, you specify the elements of the array and the single element between quotes using the syntax project in projects. Here, projects are the property inside the data object that contains an array of objects, and project is the single element of the array.
You can call this as you like, but keep in mind that what follows the in keyword must be an iterable from your data object while what comes before can be anything you like to refer to each element of the iterable.
In your case, project seems the most appropriate choice since you have an array of projects.
Now inside the HTML file, let's use the v-for to render the title of each project.
<divid="app"><h1>{{name}} {{title}}</h1><ul><liv-for="project in projects">{{project.title}}</li></ul></div>
In the code above, you used {{name}} {{title}} to render the main title for your portfolio. Then you used the v-for directive and specified inside the quests that you want to assign each element of the iteration to a project variable v-for="project in projects".
Now on each iteration, the project variable holds an object from which you can retrieve its properties using dot notation like so: {{ project.title }}.
One thing to note is that the v-for directive also gives you access to the index of the element at each iteration. You can store it in a variable as you did with the single element you called project.
To do that, you need to wrap them between parentheses and separate the element and its index with a comma, like so v-for="(project, index) in projects".
Also, note that when working with objects Vue can show an alert to inform you that the use of a key is recommended. This means that it expects a key to identify each element when it's rendered.
You can do this using the key attribute and bind it, for instance to an id property on the object or to another different property, like so
<divid="app"><h1>{{name}} {{title}}</h1><ul><liv-for="project in projects":key="project.title">{{project.title}}</li></ul></div>
Here you used the v-bind shorthand directive to bind the key attribute to the project.id property if it exists or to another property if not.
v-for can also be used to iterate over objects. In such a case, you have access to the value, the key, and also the index like so v-for="(value, key, index) in object" where 'object' is a property in the data object.
Let's now move on to another important feature of Vue: how to handle user inputs and events.
How to Handle User Input with Event Handling (v-on) in Vue
To make the application react to a user's input, Vue provides a straightforward directive called v-on. This is one of the directives that accepts arguments, similar to the v-bind directive.
With such a directive, it's easy to listen for events triggered by a user.
The v-on directive lets you run a function that executes a block of code when the user performs an action, like when they click on a button, hover on an element, or press a specific key on the keyboard.
And you can view the video on YouTube here or at the end of this section to review what you've learned.
V-on Syntax and Events
There are two types of syntax we can use, the long-form or the short. They're equivalent, so pick the one you prefer. What follows is just a representation of the syntax, and I'll explain it in detail in a minute.
Long syntax: v-on:EventName='doSomething'
Shot syntax: @EventName='doSomething'
There are many events you can listen to, such as:
click
submit
mouseover
mouseenter
mouseleave
keyup
keydown
keypress
But you can also create custom events (which you will see when you reach the components section).
Let's pick the long-form syntax: v-on:EventName='doSomething. I'll explain it more now.
First, you have the directive v-on. Then you have an argument that is the event name you want to listen for, like click. After that, the doSomething can be any method that you have defined inside the methods object of the Vue instance.
This method is like any other function that you define inside a JavaScript object. It can have parameters or not. If it has them, you can call the method and pass parameters to it as usual like this: doSomething(param, param_2, param3).
You can have something like this <div v-on:click="likeProject">Like</div> and when the user clicks on this element, it will trigger a method and run some code to increase a like counter inside a project.
Let's first create the HTML you need for that:
<divclass="projects"v-for="(project,index) in projects"><h1>{{project.title.toUpperCase()}}</h1><p>Lorem ipsum dolor sit amet.</p><div>Like
<iclass="fas fa-heart fa-lg fa-fw"@click="likeProject(index)"></i>
{{project.likes}}
</div></div>
In the code here, first you'll use the v-for directive to loop over the array of projects. Note that you should use the syntax (project, index) in projects because you will need to pass the index to the like method that you defined earlier.
After that, you output some data onto the page (like the project name in uppercase letters) then the description, and a div tag with an icon for the likes (remember to add font awesome to get the icon).
On the heart icon, add the directive v-on using the short syntax @click="likeProject(index)" between quotes that you used to invoke your likeProject(index) method. Then pass to it the index as a parameter so you can find the current project the user clicked on.
Finally, you'll render the likes onto the page for the current project using the {{project.likes}} syntax.
Now it's time to go in the Vue instance and write your method.
let app =newVue({
el:"#app",
data:{
projects:[{title:"My first project", description:"A simplified Twitter clone", likes:0},{title:"My second project", description:"Projects portfolio with GitHub", likes:0},]},
methods:{likeProject(index){const project =this.projects[index]
project.likes++
console.log(project.likes)}}});
As I said earlier, you needed to define a method to call when the user clicks on a link. So you create the likeProject method, which accepts a parameter that will be the index of the element the user clicked on.
You can then add a likes property inside your projects array and access it for the current project to increment its value every time the user clicks on your link.
How to access the original event
If for any reason you need to access the original DOM event, you could have used the special $event variable inside the method like this on the v-on directive: doSomething(param1, param2, $event). Let's see an example of that now.
You need to add the special variable in the method call on your v-on directive like so:
Then you can access the original event inside your method like so:
likeProject(index, event){
console.log(event);// get the original eventconst project =this.projects[index]
project.likes++
console.log(project.likes)}
Now that you know how the v-on directive works, let's improve our Likes example and put something more in it. We will use key modifiers in the next example, so let's quickly see what they are and what you can do with them.
Event Modifiers in Vue
With events, Vue provides access to a number of Event modifiers. They are divided into 4 main groups. You can add these modifiers to a directive to change the way your event behaves. They are like postfix and you can chain them using dot notation.
Key Modifiers:
You can add these modifiers to the @keyup listener to listen for when these keys are pressed or use them as a combination with the @click event to listen for a click+space, for example. @click.enter="doSomething"
.enter
.tab
.delete (captures both “Delete” and “Backspace” keys)
.esc
.space
.up
.down
.left
.right
System modifiers:
With these modifiers, you can trigger mouse or keyboard event listeners when the corresponding key is pressed.
.ctrl
.alt
.shift
.meta
.exact (allows control of the exact combination of system modifiers needed to trigger an event)
Mouse buttons modifiers:
These modifiers allow you to trigger a mouse event listener if the corresponding mouse button is clicked.
In the previous example, you used the v-on:click directive to trigger a mouse event listener that aimed to simulate a like on a project.
But the user was able to add as many likes they wanted by clicking on the icon.
In the next example, you will do things a bit differently.
First, you will prevent the user from adding more than one like to each project,
Then you will let the user remove a like
Finally, you will keep the likes on the page even after the user refreshes the page.
Let's get started. This time you will use mouse button modifiers to listen for clicks. The left mouse button click will trigger the add like behaviour and the right mouse button click will trigger the remove behaviour.
Inside your HTML file:
<divid="app"><!-- Users can like a project with a left click and dislike it with right click --><divclass="projects"v-for="project in projects"><h1>{{project.title.toUpperCase()}}</h1><p>Lorem ipsum dolor sit amet.</p><div>Like
<iclass="fas fa-heart fa-lg fa-fw"@click.left="addLike(project)"@click.right="removeLike(project, $event)"></i>
{{project.likes}}
</div></div></div>
In the code above you have taken what you had before and simply added a left mouse button key modifier to the click event @click.left. Then you invoked the addLike method. This will make your project like counter increase by one as we have seen before.
Then you added another event listener to the same element, but this time you used the .right mouse button key modifier to listen when the user clicks on our icon using the right button @click.right="removeLike()".
In the remove like method, you have also passed the special variable $event so that you can use the original event later in your method to prevent its default behaviour and open the contextual menu.
But we said earlier that you can also chain key modifiers and indeed there is a .prevent key modifier that you can use here instead of the $event variable. You could do the same like this: @click.right.prevent="removeLike(project)"
Let's see how to structure your main.js file:
let app =newVue({
el:"#app",
data:{
name:"John Doe",
title:"Portfolio",
projects:[{title:"My first project", description:"A simplified Twitter clone", likes:0},{title:"My second project", description:"Projects portfolio with GitHub", likes:0},]},
methods:{addLike(project){
console.log(project)},removeLike(project, event){
console.log(project)
console.log(event)}}});
So in the data object, you have a projects property that is an array of objects. Each object has a likes property that you will increment or decrement depending on what mouse button the user clicks.
Inside the methods object, you created the two methods you referenced in your v-on directives addLike() and removeLike(). For now, you are only logging to the console the project parameter value and the event value. You will implement the logic in a minute.
Let's start with the add likes method – it could look like this:
There are a few things going on here. In the first line, you're storing the project title inside the projectTitle variable. Then, you said you wanted data to persist if you refresh the page so you are using the localStorage API to store information inside the client browser.
You increment the likes count by one, but you do that depending on a value inside the local storage.
You can do this by first checking to see if there is a key in the localStorage matching your project title, if(!localStorage.getItem(projectTitle)).
If this evaluates to false, then you will run the code inside the if block and first increment the likes project.likes++.
Second, use the .setItem() method of the local storage API to set a key-value pair with the project title as the key and a boolean value as its value localStorage.setItem(projectTitle, true).
To put an item in the local storage, you'll use localStorage.setItem(). The set item method accepts a key-value pair. Your key will be the title you saved in the variable projectTitle and the value will the boolean value true.
Now let's see if this works.
removeLike(project, event){
event.preventDefault();// This can be omitted if we use the prevent key modifierconst projectTitle = project.title;if(project.likes >0&& localStorage.getItem(projectTitle)){
project.likes--;
localStorage.removeItem(projectTitle);}}
This function does the opposite of the previous. When the user clicks their right mouse button, the method removeLikes() is executed and you do the following:
First things first, you need to prevent its default behaviour. Otherwise when the user right-clicks on the icon, the contextual menu will pop up and we don't want that. So, you'll use the event.preventDefault() method on the original event that is represented by the event parameter on your method.
Alternatively, you can omit this if you use the prevent key modifier in the v-on directive @click.right.prevent="removeLike(project).
The next step is to grab the project title. Since you also passed a parameter to the method to represent the current project object removeLike(project, event), you can store the project title in a variable projectTitle.
Then you need to make a couple of checks. First, you want to decrement the likes only if its value is greater than zero. Then you want to make sure the project title is in the local storage as a key with a value.
So, in your condition, you have done both checks if(project.likes > 0 && localStorage.getItem(projectTitle)). Now, if both conditions evaluate to true, the code inside the if block can run.
First you remove the like by decrementing its value project.likes--. Then you remove the project title from the local storage using the removeItem method and pass to it the key you want to remove (which is the project title localStorage.removeItem(projectTitle)).
To put it all together, you should now have the following code:
let app =newVue({
el:"#app",
data:{
name:"John Doe",
title:"Portfolio",
projects:[{title:"My first project", description:"A simplified Twitter clone", likes:0},{title:"My second project", description:"Projects portfolio with GitHub", likes:0},]},
methods:{addLike(project){//console.log(project, "like");const projectTitle = project.title;// check if the current project is not in the local storageif(!localStorage.getItem(projectTitle)){// set the item in the storage and increase the likes counter
project.likes++;
localStorage.setItem(projectTitle,true);}},removeLike(project){const projectTitle = project.title;
console.log(project,"dislike");if(project.likes >0&&Boolean(localStorage.getItem(projectTitle))){
project.likes--;
localStorage.removeItem(projectTitle);}}},mounted(){this.projects.forEach(project=>{if(localStorage.getItem(project.title)!==null){
project.likes =1;}});}});
To make the code work, you also need to add a life cycle hook called mounted. This will let you run code when the root element is mounted on the Vue instance. With it, you can check if the localStorage has a key corresponding to your project title and if so, update the value of the likes counter.
And your HTML is still the same:
<divid="app"><!-- Users can like a project with a left click and dislike it with right click --><divclass="projects"v-for="project in projects"><h1>{{project.title.toUpperCase()}}</h1><p>Lorem ipsum dolor sit amet.</p><div>Like
<iclass="fas fa-heart fa-lg fa-fw"@click.left="addLike(project)"@click.right="removeLike(project, $event)"></i>
{{project.likes}}
</div></div></div>
Remember that you can get rid of the $event variable passed to the removeLike method by using the event key modifier like so: @click.right.prevent="removeLike(project)"
You have learned a lot so far! And now that you have seen key modifiers in action, we can move forward to the next topic: two-way model binding and the v-model directive. Then we'll start building our Twitter clone.
Two Way Model Binding (v-model) in Vue
All right, so far we have seen how to bind properties from the data object to our HTML tags and inside attributes,
how to loop over a sequence of elements and, how to display conditionally elements onto our template with conditionals.
We have covered how to define methods inside the methods object so that we can perform more complex operations on our data and,
we have learned how to work with events using the v-on directive.
In the next section, we will look at how Vue opens a two-way communication channel between a form's input and, a property defined
inside the data object. Then we will use this knowledge to build our first project together.
And you can view the video on YouTube here or at the end of the section if you want to review what you've learned.
How does the v-model directive work?
The v-model is another Vue directive. You can use it out of the box, and it's useful to simplify the way an input tag can communicate
with a Vue instance's property in the data object.
It works like all the other directives. The main difference is that when it's implemented, your application will listen for changes
inside the input with this v-model directive and update the attached property's value immediately inside the data object and vice-versa.
It is effectively a two-way communication channel between your template and the Vue instance. It's the Vue way to interact with user input and simplify your life as a developer.
Let's look at a straightforward example.
How to use the v-model on an input tag
First, you need an input tag inside the element you defined as the root element in the Vue instance, the div with an id of app.
<divid="app"><h2>What do you want to tweet about today?</h2><inputtype="text"v-model="tweet"placehoder="What's happening today?"></div>
In the HTML you have an input tag, which has the v-model directive attached to it as an HTML attribute. Anything between quotes is computed as a JavaScript expression, so you write the name of a property tweet that you will create inside the Vue data object.
So let's do it.
let app =newVue({
el:'#app',
data:{
tweet:""}});
So now you have a Vue instance and, in it, you have a data object with a tweet property that has an empty string as its value.
If you open the console and inspect the Vue element, you can see the two-way data binding in action.
By changing the value of the tweet property, you will immediately update the value inside the input tag and vice-versa.
You have this tweet property in the data object and you already know how to render its content onto the page. So now you can update your markup and add a paragraph under the input tag to see the value dynamically changing while you type.
<divid="app"><h2>What do you want to tweet about today?</h2><inputtype="text"v-model="tweet"placehoder="What's happening today?"><p>{{tweet}}<p></div>
How cool is that? Now you can see the tweet property changing in real-time as you type.
That's the two-way data binding. If you change the content of the tweet property directly it will be reflected in your template, too.
If you want to learn more, make sure to read the official Documentation too.
How to build a tweet box
Now, let's raise the bar a little and build something together.
We will create a simple textarea with a submit button,
We will display the number of characters the user has left while they are typing so that they can submit the form without exceeding the max number of characters allowed.
Like in a tweet, the maximum number of characters will be 200.
How to define the initial markup
Now you need to define a markup. So inside our index.html file, write the following code:
<divid="app"><h2>What do you want to tweet about today?</h2><formv-on:submit.prevent="submitData"><!-- Code here --></form><!-- More code here --></div>
First you have first created your root element for the Vue instance so that it can monitor the markup and do its magic.
Then you created a form tag with an event listener using the directive v-on, which listens for the submit event and runs a function submitData that you still have to create.
You also added the .prevent modifier so that the page doesn't refresh when you submit the form.
How to define the Vue instance and methods
Let's define our Vue instance and create the submitData method so that you can use it later when you need it.
let app =newVue({
el:'#app',
data:{// data object props here},
methods:{submitData(){// Code here}},});
How to add a text area and a submit button
Now back to the HTML: let's add the text area inside your form.
<divid="app"><h2>What do you want to tweet about today?</h2><formv-on:submit.prevent="submitData"><!-- Code here --><divclass="form_group"><labelfor="name">Tweet</label><textareaname="tweet"id="tweet"cols="80"rows="10"v-model="tweet"maxlength="200"></textarea></div><buttontype="submit">Tweet</button></form><!-- More code here --></div>
Inside the form tag, you create a label and a textarea for your tweet box.
On the textarea you use the directive v-model to bind the textarea value to a tweet property and vice-versa. So now when one changes the other changes, too.
NOTE: The v-model directive is used on form elements like inputs, text areas, check box, and more.
After the textarea you put a button of type submit so that when a user clicks it the form's data are sent to your application's submitData() method and you can process them.
How to add properties to the Vue instance
Now inside your JavaScript file, you need to create the tweet property in the data object and do something with this information so that you can later show a list of tweets sent.
We also said that we want to limit the characters to 200 and show an error when they're in excess.
So let's add a few more properties here like:
tweet for the current tweet message that the user inputs in the text area
tweets for the list of tweets
max_length for the characters limit
let app =newVue({
el:'#app',
data:{
tweets:[],
tweet:"",
max_length:200,},
methods:{submitData(){/* Handle the tweet */}},});
So now with the tweets property as an array and using the two-day binding between the tweet property and the textarea, you can push all tweets inside the tweets array when the user submits the form by triggering the submitData method.
How to implement the character counter
Before implementing the submitData method, you can show a character counter while the user types in the textarea.
Let's implement this feature so the user knows if they can submit the tweet or not.
Back in the HTML file, you can add a div with a couple of span elements and use a v-if directive to check the length of the character. It'll show the counter while the user is within the characters limit, otherwise it'll show an error message.
<divid="app"><h2>What do you want to tweet about today?</h2><formv-on:submit.prevent="submitData"><divclass="form_group"><labelfor="name">Tweet</label><textareaname="tweet"id="tweet"cols="80"rows="10"v-model="tweet"></textarea></div><buttontype="submit">Tweet</button></form><!-- Show character limits here --><div><spanv-if="tweet.length < max_length"> {{ `Max: ${tweet.length} of ${max_length} characters` }}
</span><spanclass="errorMessage"v-else>{{`Max char limit reached! excess chars: ${max_length - tweet.length}`}}</span></div></div>
The code above uses two-way data binding between the tweet property and the textarea to find out if the user has reached the character limit that you defined as the max_lenght property.
Since the tweet property is connected to the textarea, you can use the v-if directive combined with the tweet.length and the max_length properties to make the comparison.
Now, every time the user types something in the textarea, the string saved in the tweet property increases by one character. Then you can use the .length property to see how long the whole string is and compare it against your max_length property.
You use the directive v-if="tweet.length <= max_length" to make your comparison. When this comparison returns true, the user will see the span tag with its content, the counter.
Inside the span tag, you used the moustache syntax to show the user the current length of the property tweet and the character limit.
<spanv-if="tweet.length < max_length"> {{ `Max: ${tweet.length} of ${max_length} characters` }}</span>
After the v-if directive, a v-else directive handles the error message that you show to the user when there are no characters left to use.
Here the content of the span element shows a message that tells how many characters there are in excess by subtracting the tweet length from the max_lenght property.
The method above first checks if the length of the tweet property is less than or equal to the max_length property. If the condition evaluates to true, then you can add the tweet content to the array using the unshift method (which adds it to the beginning of the array).
Finally, you need to clear the value of the tweet property. You can do this by assigning to it an empty string again.
NOTE that since you are inside a method, you need to use the this keyword to grab properties and eventually methods inside the Vue instance.
How to show a list of tweets
Now, you can also show a list of tweets in your template.
To do that you will use a v-for directive and loop over the tweets array to show each tweet.
<ul><liv-for="text in tweets">{{text}}</li></ul>
Put it all together
The final code now looks like this:
<!DOCTYPE html><htmllang="en"><head><metacharset="UTF-8"><metaname="viewport"content="width=device-width, initial-scale=1.0"><title>VueJs v-model</title><linkrel="stylesheet"href="https://stackpath.bootstrapcdn.com/bootstrap/4.3.1/css/bootstrap.min.css"integrity="sha384-ggOyR0iXCbMQv3Xipma34MD+dH/1fQ784/j6cY/iJTQUOhcWr7x9JvoRxT2MZw1T"crossorigin="anonymous"><!-- Fontawesome CDN --><linkrel="stylesheet"href="https://use.fontawesome.com/releases/v5.1.1/css/all.css"integrity="sha384-O8whS3fhG2OnA5Kas0Y9l3cfpmYjapjI0E4theH4iuMD+pLhbf6JI0jIMfYcK3yZ"crossorigin="anonymous"><!-- VueJS CDN --><scriptsrc="https://cdn.jsdelivr.net/npm/vue@2.6.12/dist/vue.js"></script><style></style></head><body><divid="app"class="container"><h2>What do you wanna tweet about today</h2><!-- Tweet form --><formv-on:submit.prevent="submitData"><divclass="form-group"><label>Tweet</label><textareaclass="form-control"cols="30"rows="5"v-model="tweet"></textarea></div><buttontype="submit"class="btn btn-primary">Tweet</button></form><!-- Alert the user --><divclass="my-3"><spanv-if="tweet.length < max_length">
{{ ` Max: ${tweet.length} of ${max_length} characters` }}
</span><spanclass="alert alert-danger"v-else> {{ `Max char limit reached! excess characters: ${max_length -
tweet.length} ` }}</span></div><!-- Tweets message --><ul><liv-for="tweet in tweets">
{{tweet}}
</li></ul></div><scriptsrc="./main.js"></script></body></html>
Our final javascript file
let app =newVue({
el:'#app',
data:{
tweet:"",
tweets:[],
max_length:200},
methods:{submitData(){// Handle the tweet submissionif(this.tweet.length <=this.max_length){this.tweets.unshift(this.tweet);this.tweet ="";}}}})
Improvements you can make
If you take this bit of code from your index.html file, there is something you can do to clean up our code...
<!-- Show the max char messages --><div><spanv-if="tweet.length < max_length"> {{ `Max: ${tweet.length} of ${max_length} characters` }}
</span><spanclass="errorMessage"v-else>{{`Max char limit reached! excess chars: ${max_length - tweet.length}`}}</span></div>
To clean this template file, we can follow two approaches that are exactly the same, except that one is cached and the other one isn't.
Computed Properties (cached)
Methods (not cached)
In the next section, we will learn what computed properties are and how they differ from methods.
Computed Properties and methods
You should use computed properties instead of in-template expressions for complex logic that has the scope of changing the presentation of our data, not the data itself.
If we need to change the data, then you should use methods instead. Computed properties are cached based on their dependencies, meaning that it will re-evaluate only when its dependencies have changed.
With computed properties, the result of the previously run function is returned if the dependencies have not changed.
You can view the repository here and watch the video on YouTube here. The video is also listed at the end of this section so you can review what you've learned.
In the following example, we will use computed properties but we could also use methods. Generally speaking, we use computed properties when we have an expensive operation that we want to execute and cache so that the next time we don't have to run it again unless something has changed.
Let's implement a computed property for the following messages. Our HTML file will now change from this:
<!-- Show the max char messages --><div><spanv-if="tweet.length < max_length"> {{ `Max: ${tweet.length} of ${max_length} characters` }}
</span><spanclass="errorMessage"v-else>{{`Max char limit reached! excess chars: ${max_length - tweet.length}`}}</span></div>
to this much cleaner version:
<!-- Show the max char messages --><div><spanv-if="tweet.length < max_length"> {{ maxCharsText }}
</span><spanclass="errorMessage"v-else>{{errorMessage}}</span></div>
We have replaced the contents of both spans with two new properties that will be placed as methods inside our computed object.
Now inside our Vue instance, we will create a new object called computed where we will define two methods that will return the messages we had before.
The first method maxCharsText returns exactly the same string we had before inside our HTML file. The only difference is that we are using the keyword this to reference the properties we needed to grab inside the Vue instance this.tweet.length and this.max_length.
The second method works in the exact same way and it also uses the keyword this to pick the properties defined in the Vue instance this.max_length and this.tweet.length.
All together
<divid="app"><h2>What do you want to tweet about today?</h2><formv-on:submit.prevent="submitData"><divclass="form_group"><labelfor="name">Tweet</label><textareaname="tweet"id="tweet"cols="80"rows="10"v-model="tweet"></textarea></div><buttontype="submit">Next</button></form><div><spanv-if="tweet.length < max_length"> {{ maxCharsText }}
</span><spanclass="errorMessage"v-else>{{errorMessage}}</span></div><ul><liv-for="text in tweets">{{text}}</li></ul></div>
If we want to use methods instead of computed properties, we can simply move both methods from the computed object inside the methods object and invoke them with parenthesis inside our HTML file like so:
Just remember that computed properties are cached while methods are not.
If you want to learn more make sure to read the official documentation.
How to Create a Simple Twitter Clone
Now, let's put together everything we've learned so far and and build our very first project. It will be a minimalist and simplified twitter-like web application.
We want to create a simple application that has some kind of registration form, a box to add new tweets, and a section where we can show all tweets. We also want to be able to remove tweets.
All data must be persistent so that after the page is refreshed the list of tweets is still visible while the registration form will be hidden.
You can watch the video on YouTube here or at the end of this section if you want to review.
Let's break this down into large tasks first. Then we will see what we need to do to complete each one.
create a registration form
create a tweets box form
create a tweets section
To do our project we need to research what tools we need to use to achieve our goals, so lets put them down:
VueJS (application logic)
localStorage (make data persistent)
font awesome (icons)
This application has no database so we are unable to record multiple users and their tweets. It's just a proof of concept, something we build to use our new knowledge.
Create the project structure
Now that we know what to do, let's start by creating our project structure and importing the tools we need to complete the first task, the registration form.
<!DOCTYPE html><htmllang="en"><head><metacharset="UTF-8"><metaname="viewport"content="width=device-width, initial-scale=1.0"><title>Simple tweetter clone</title><!-- CDN Fontawesome --><linkrel="stylesheet"href="https://cdnjs.cloudflare.com/ajax/libs/font-awesome/5.15.1/css/all.min.css"integrity="sha512-+4zCK9k+qNFUR5X+cKL9EIR+ZOhtIloNl9GIKS57V1MyNsYpYcUrUeQc9vNfzsWfV28IaLL3i96P9sdNyeRssA=="crossorigin="anonymous"/><!-- VueJS development version, includes helpful console warnings --><scriptsrc="https://cdn.jsdelivr.net/npm/vue/dist/vue.js"></script><!-- Style sheet --><linkrel="stylesheet"href="style.css"></head><body><divid="app"><!-- Register an account --><!-- Add a tweet --><!-- Show all tweets --></div><!-- Link our main.js file --><scriptsrc="./main.js"></script></body></html>
Now that our HTML file is ready, let's create the main.js file and create a Vue instance.
let app =newVue({
el:'#app',
data:{},
methods:{}});
Finally, we need to create a style.css file that we will place for now in the root folder of our project.
We will use a CSS file that I have already written, and you can download it from here.
OK, our basic structure is ready to go. Inside our HTML file, we have some comments that reflect our 3 main tasks: create a registration form, create an add tweet box and, show a list of tweets.
Let's start with the first task and simulate a registration form.
How to simulate a registration form - HTML
Inside the root element <div id="app"></div> we need to create a registration form with the following fields: name, email, password, and a submit button. The form is contained in a card so we will wrap everything in a div and assign to it a card class.
The form won't submit data to a server, but will simply simulate a registration and update some property in the data object of the Vue instance.
We will place the following code inside our HTML file:
<!-- Register an account --><divclass="card"><iclass="fab fa-twitter fa-lg fa-fw"></i><h2>Create your account</h2><formv-on:submit.prevent="registerAccount"><divclass="form_group"><labelfor="name">Name</label><inputtype="text"v-model="name"maxlength="25"required></div><divclass="form_group"><labelfor="email">Email</label><inputtype="email"v-model="email"maxlength="25"required></div><divclass="form_group"><labelfor="password">Password</label><inputtype="password"v-model="password"maxlength="16"required></div><buttontype="submit">Register</button></form></div>
Let's break this down. First, the form tag has a v-on directive with a submit argument so it will listen for a submit event. It also has an event modifier .prevent so when we hit the submit button the page doesn't refresh.
Inside the v-on directive there is a method called registerAccount that we need to create inside the methods of the Vue instance.
Inside the form, we have the three input fields: name, email, and password with labels. We wrapped each field inside a div with a class of form_group. Later we can replicate the style of the Twitter registration fields and show a character counter.
Each input field has a v-model directive that binds the input to its data property.
How to simulate a registration form - Vue
Let's move on to the Vue instance to make the binding between the form and the data object properties.
Here we also need a place where we can store the details that the user submits so we will create another property for that.
Looking at the input fields, we also put a maxlength property on them, which is 25 for the name and email and 16 for the password.
Like we did previously when we learned about the v-model, we can create a property for these limits so that we can use it to show the user how many characters the user has left.
The Vue instance will look like this:
let app =newVue({
el:'#app',
data:{
userData:{}
name:"",
email:"",
password:"",
max_length:25,
max_pass_length:16},
methods:{registerAccount(){// record user details// add registration to localStorage// clear the registration fields}}});
Let's break this down. First inside the data:{} object, we defined an object to store and retrieve the userData. Then we added the properties name, email, and password to make the two-way data binding work.
Finally we added the max_length and max_pass_length propeties.
How to show input character counter
OK, now that we have a binding between the input fields and our properties, we can show a character counter to the user while they're typing.
This is fairly simple – all there is to do is to show the length of each input property and compare it with the max length properties we have set in the Vue instance.
So here we created a string using an in-template expression. We've shown the length of the name property and the value of the max_length so that while the user types we show something like this: 13/25.
We've also used a v-bind directive on the maxlength attribute so that its value is bound to the value of the property we defined in the Vue instance. So in case we want to change it we can do so in one place.
How to add the logic to the registerAccount method
Now it's time to work on the form submission logic. We will simply populate the object stored in the property userData when the user submits the form.
Inside the registerAccount method we will add the details the user passes and build our object.
registerAccount(){// record user detailsthis.userData.name =this.name,this.userData.email =this.email,this.userData.password =this.password
// add registration to localStorage// clear the registration fieldsthis.name ="";this.email ="";this.password ="";}
Here we have taken the value of the properties name, email, and password and assigned them to properties we created in the userData object.
This seems fine mostly because we have put on our input fields the required attribute – but if we remove it we will be able to submit an empty form, and we don't want that.
So let's add a very basic form of validation to at least check if the user has typed something inside our form, otherwise we show an error.
To do this, we need to add an if block inside the method and also an error property to the data object. Our file now looks like this:
let app =newVue({
el:'#app',
data:{
userData:{},
usersID:0,
name:"",
email:"",
password:"",
max_length:25,
max_pass_length:16,
error:"",},
methods:{registerAccount(){if(this.name !==""&&this.email !==""&&this.password !==""){this.userData.id =++this.usersID,this.userData.name =this.name,this.userData.email =this.email,this.userData.password =this.password
}else{this.error ="Complete all the form fields"}/* Add registration data to the local storage *//* Clear the registration inputs */this.name ="";this.email ="";this.password ="";}}});
Here in the registerAccount we've written a conditional that checks if the length of the name property is not empty, if the email property isn't empty, and if the password isn't empty this.name !== "" && this.email !== "" && this.password !== "".
If all these checks evaluate to a true value, then we run the code inside the block. Otherwise we run the code in the else block that updates the value of the error property that we will now use in our template to show the error message.
We also added a new property usersID: 0, that we used inside the if block to assign an id property to the userData object, just to make our application more realistic. But of course it is useless, as we will not have a database where we store all user details. We'll just store a single user inside their browser's local storage.
Now our form is complete and we're also displaying an error message to the user if the required attributes are removed from our markup.
But our data do not persist and when the page is refreshed –everything's all gone. Let's tackle that using the localStorage API.
Inside our Vue instance, we need to set an item in the local storage. But we also need to save the entire userData object so that later we can use its data to display a message to the registered user.
/* Add registration data to the local storage */
localStorage.setItem('simple_tweet_registered',true)/* Add the whole userData object as JSON string */
localStorage.setItem('simple_tweet_registered_user',JSON.stringify(this.userData))
Here we use the setItem method of the Local Storage API to add an item to the local storage so that later we can use it to check if the user is registered or not.
Then we also need to store the entire userData object as a string. To do that we use the JSON.stringify method that will turn the object into a JSON string that can be saved in the localStorage.
Our JS file is now as follows:
let app =newVue({
el:'#app',
data:{
userData:{},
usersID:0,
name:"",
email:"",
password:"",
max_length:25,
max_pass_length:16,
error:"",},
methods:{registerAccount(){if(this.name !==""&&this.email !==""&&this.password !==""){this.userData.id =++this.usersID,this.userData.name =this.name,this.userData.email =this.email,this.userData.password =this.password
}else{this.error ="Complete all the form fields"}/* Add registration data to the local storage */
localStorage.setItem('simple_tweet_registered',true)/* Add the whole userData object as JSON string */
localStorage.setItem('simple_tweet_registered_user',JSON.stringify(this.userData))/* Clear the registration inputs */this.name ="";this.email ="";this.password ="";}}});
Now when the user visits our application page, we need to check inside the browser's local storage to see if there is a key called simple_tweet_registered. If there is, we can assume that the user is registered and we can show the next section, the tweet box. Otherwise, we show the registration form.
We will do that by creating a registered: false property in the data object and use it to display or hide the registration form.
Now to make this work, we will use the lifecycle hook we created which lets us inject our code when the Vue instance has been created. This is because we want to check this before mounting our root element.
So let's add a life cycle hook to the Vue instance. We will check if our key is there, and if so we will update the value of the registered property to true.
We have also stored the full userData object in the local Storage so we can use it to repopulate the userData object when the page is refreshed with the details the user submitted.
created(){/* Check if the user is registered and set the registered to true */if(localStorage.getItem("simple_tweet_registered")==='true'){this.registered =true;}// repopulate the userData objectif(localStorage.getItem('simple_tweet_registered_user')){this.userData =JSON.parse(localStorage.getItem('simple_tweet_registered_user'))}}
To turn a JSON string back into an object, we can use the JSON.parse method.
Now it's all set for the next task – show a tweet form to the user after registration.
Our code so far looks like this:
The main.js file:
let app =newVue({
el:'#app',
data:{
userData:{},
usersID:0,
name:"",
email:"",
password:"",
max_length:25,
max_pass_length:16,
error:"",
registered:false,},
methods:{registerAccount(){if(this.name.length >0&&this.name.length <=this.max_length &&this.email !==""&&this.password !==""){this.userData.id =++this.usersID,this.userData.name =this.name,this.userData.email =this.email,this.userData.password =this.password
this.registered=true;}else{this.error ="Complete all the form fields"}/* Add registration data to the local storage */
localStorage.setItem('simple_tweet_registered',true)/* Add the whole userData object as JSON string */
localStorage.setItem('simple_tweet_registered_user',JSON.stringify(this.userData))/* Clear the registration inputs */this.name ="";this.email ="";this.password ="";}},created(){/* Check if the user is registered and set the registered to true */if(localStorage.getItem("simple_tweet_registered")==='true'){this.registered =true;}// repopulate the userData objectif(localStorage.getItem('simple_tweet_registered_user')){this.userData =JSON.parse(localStorage.getItem('simple_tweet_registered_user'))}}});
Here in the HTML, since we used the v-else on the add tweet section and used the local storage to retrieve the data submitted by the user, we can use an in-template expression to grab the user name so that we can output a welcome message.
In the next section, we will create a tweet box form so that after the registration the user can write a tweet.
How to create a tweet box form - HTML
Now it's time to build our add tweet form. We did something very similar earlier in this article, but now we will need to store and make the data persistent. This lets us show a list of tweets even when the page refreshes.
<divclass="tweetBox"v-else><h2>Welcome {{ userData.name }} write your first Tweet</h2><formv-on:submit.prevent="sendTweet"><divclass="form_group"><labelfor="tweet">
Send your tweet
<span> {{ tweetMsg.length + '/' + max_tweet }}</span></label><textareaname="tweet"id="tweet"cols="30"rows="10"v-model="tweetMsg"maxlength="200"></textarea></div><buttontype="submit">Tweet</button></form></div>
This is nothing new to us now. Inside the tweetBox element we add a form with the usual v-on directive and a method sendTweet that we will need to define inside the methods object. This will take the tweet and save it somewhere, maybe in a property in the data object.
Inside the form, there is a textarea that has a v-model directive that binds it to a tweetMsg property that we need to create.
Finally, a submit button.
We also have a span inside the tweet label that shows a character counter to the user as we did before in the registration form.
Here we have a new property max_tweet that is used to show the limit and the tweetMsg.length is used to show the current number of the characters inserted.
You can watch the video on YouTube here if you want to review what you've learned.
Create a tweets box form - Vue
Let's go to the Vue instance and add the properties and the sendTweet methods.
Our data object now has three more properties, the max_tweet set to 200, the tweetMsg that binds to the textarea, and a tweets array that we will use to store all tweets the user sends.
data:{
userData:{},
usersID:0,
name:"",
email:"",
password:"",
max_length:25,
max_pass_length:16,
max_tweet:200,// max tweets lenght
error:"",
registered:false,
tweetMsg:"",// current tweet
tweets:[]// list of tweets}
Inside the methods, we have a new method that will be invoked by the v-on directive when the form is submitted:
sendTweet(){/* Store the tweet in the tweets property */this.tweets.unshift({
text:this.tweetMsg,
date:newDate().toLocaleTimeString()});/* Empty the tweetMsg property */this.tweetMsg ="";//console.log(this.tweets);/* Tranform the object into a string */
stringTweets =JSON.stringify(this.tweets)//console.log(stringTweets);/* Add to the local storage the stringified tweet object */
localStorage.setItem('simple_tweet_tweets', stringTweets)},
The code above does four things:
takes the tweets array and adds in it an object to represent a single tweet with text and date properties. To the text property, we assign the value of the tweetMsg that is bound with the textarea. For the date, we create a new date object with the new Date().toLocaleTimeString() method.
we empty the value of the tweetMsg
we transform the tweets property into a string using the method JSON.stringify(this.tweets)
Then we add it to the local storage.
Our final main.js file now looks like this:
let app =newVue({
el:'#app',
data:{
userData:{},
usersID:0,
name:"",
email:"",
password:"",
max_length:25,
max_pass_length:16,
error:"",
registered:false,},
methods:{registerAccount(){if(this.name.length >0&&this.name.length <=this.max_length &&this.email !==""&&this.password !==""){this.userData.id =++this.usersID,this.userData.name =this.name,this.userData.email =this.email,this.userData.password =this.password
this.registered=true;}else{this.error ="Complete all the form fields"}/* Add registration data to the local storage */
localStorage.setItem('simple_tweet_registered',true)/* Add the whole userData object as JSON string */
localStorage.setItem('simple_tweet_registered_user',JSON.stringify(this.userData))/* Clear the registration inputs */this.name ="";this.email ="";this.password ="";},sendTweet(){/* Store the tweet in the tweets property */this.tweets.unshift({
text:this.tweetMsg,
date:newDate().toLocaleTimeString()});/* Empty the tweetMsg property */this.tweetMsg ="";//console.log(this.tweets);/* Tranform the object into a string */
stringTweets =JSON.stringify(this.tweets)//console.log(stringTweets);/* Add to the local storage the stringified tweet object */
localStorage.setItem('simple_tweet_tweets', stringTweets)},},created(){/* Check if the user is registered and set the registered to true */if(localStorage.getItem("simple_tweet_registered")==='true'){this.registered =true;}// repopulate the userData objectif(localStorage.getItem('simple_tweet_registered_user')){this.userData =JSON.parse(localStorage.getItem('simple_tweet_registered_user'))}}});
Now that we've completed this part, we can show a list of tweets and also handle when the page is refreshed, and the local storage has in it our tweets object. We will need to parse it back and add its content to the tweets property to see the list.
Next, we will learn how to show the list of tweets using a v-for directive.
How to show a list of tweets - HTML
Inside our root element, add the following code:
<!-- Show all tweets --><divclass="card_tweets"><sectionclass="tweets"v-if="tweets.length > 0"><h2>Tweets</h2><divclass="tweetMsg"v-for="(tweet, index) in tweets"><p>
{{tweet.text}}
</p><divclass="tweetDate"><iclass="fas fa-calendar-alt fa-sm fa-fw"></i>{{tweet.date}}
</div></div></section><divv-else>No tweets to show</div></div>
Here we wrap everything in a div with a class card_tweets. Then we use a v-if directive inside a child section to check if there are tweets in the tweets array v-if="tweets.length > 0".
Inside this section, we can loop over the tweets array using a v-for="(tweet, index) in tweets" directive. After that we use in-template expressions to show the tweet text property {{tweet.text}} and the data {{tweet.date}}.
After the section we can use a v-else directive to show a message in case there are no tweets stored inside the tweets array <div v-else>No tweets to show</div>. Done.
Now there's one last thing we need to do, and that is to figure out what to do to remove tweets from the list.
But when the user refreshes the page, everything is gone. So we need to work with the localStorage once again to repopulate our tweets array from it before rendering the root element.
Inside the created lifecycle hook we will now write some code to parse the tweets and save them back in the tweets property:
/* Parse all tweets from the local storage */if(localStorage.getItem("simple_tweet_tweets")){
console.log("There is a list of tweets");this.tweets =JSON.parse(localStorage.getItem('simple_tweet_tweets'))}else{
console.log("No tweets here");}
Here we used the localStorage API to first check if there was a key called simple_tweet_tweets. If so, we grab the tweets property using this.tweets and assign to it the content of the localStorage. But we parse the string back to JSON with JSON.parse so we write this.tweets = JSON.parse(localStorage.getItem('simple_tweet_tweets')).
Now everything works. After we refresh the page, the tweets are still there. Let's move on. In the next step, we will add a method to remove tweets from the list.
You can watch the video on YouTube here or at the end of this section to review what you've learned.
How to remove tweets
Inside the div that contains the tweet message, we can add another div to show a link and a trash icon. This lets the user click it and remove that tweet.
<divclass="tweet_remove"@click="removeTweet(index)"><spanclass="remove">Delete this tweet <iclass="fas fa-trash fa-xs fa-fw"></i></span></div>
Here we simply used a v-on short syntax directive on the div and invoked a method removeTweet(index), passing to the method the element index so that we know what to remove.
Let's build our removeTweet method now:
removeTweet(index){let removeIt =confirm("Are you sure you want to remove this tweet?")if(removeIt){this.tweets.splice(index,1);/* Remove the item also from the local storage */
localStorage.simple_tweet_tweets =JSON.stringify(this.tweets)}}
This bit of code is pretty straightforward. Our method accepts an index that represents the position of the tweet object in the array obtained from the v-for directive when the method is invoked.
We then create a variable to ask the user to confirm that they want to delete the tweet. We used the confirm function for that.
If the value of the removeIt variable is true, then we execute the code and use this.tweets.splice(index, 1) to remove the tweet from the array using its index.
Finally we update the localStorage value by assigning to is the new array using the localStorage.simple_tweet_tweets = JSON.stringify(this.tweets).
<!DOCTYPE html><htmllang="en"><head><metacharset="UTF-8"><metaname="viewport"content="width=device-width, initial-scale=1.0"><title>Vue 2 Hello World</title><linkrel="stylesheet"href="https://use.fontawesome.com/releases/v5.1.1/css/all.css"integrity="sha384-O8whS3fhG2OnA5Kas0Y9l3cfpmYjapjI0E4theH4iuMD+pLhbf6JI0jIMfYcK3yZ"crossorigin="anonymous"><!-- Axios CDN --><scriptsrc="https://cdnjs.cloudflare.com/ajax/libs/axios/0.21.0/axios.min.js"integrity="sha512-DZqqY3PiOvTP9HkjIWgjO6ouCbq+dxqWoJZ/Q+zPYNHmlnI2dQnbJ5bxAHpAMw+LXRm4D72EIRXzvcHQtE8/VQ=="crossorigin="anonymous"></script><!-- development version, includes helpful console warnings --><scriptsrc="https://cdn.jsdelivr.net/npm/vue/dist/vue.js"></script><linkrel="stylesheet"href="https://use.fontawesome.com/releases/v5.1.1/css/all.css"integrity="sha384-O8whS3fhG2OnA5Kas0Y9l3cfpmYjapjI0E4theH4iuMD+pLhbf6JI0jIMfYcK3yZ"crossorigin="anonymous"><linkrel="stylesheet"href="style.css"></head><body><divid="app"><divclass="card"><iclass="fab fa-twitter fa-lg fa-fw"></i><!-- Register an account --><divclass="register"v-if="!registered"><buttonform="register"type="submit">Register</button><h2>Create your account</h2><formid="register"v-on:submit.prevent="registerAccount"><divclass="form_group"><labelfor="name">Name
<span> {{ name.length + '/' + max_length }}</span></label><inputtype="text"v-model="name":maxlength="max_length"required></div><divclass="form_group"><labelfor="email">Email
<span> {{ email.length + '/' + max_length }}</span></label><inputtype="email"v-model="email":maxlength="max_length"required></div><divclass="form_group"><labelfor="password">Password
<span> {{ password.length + '/' + max_pass_length }}</span></label><inputtype="password"v-model="password":maxlength="max_pass_length"required></div></form><divv-if="error.length > 0"> {{error}}</div></div><!-- Add tweet --><divclass="tweetBox"v-else><h2>Welcome {{ userData.name }} write your first Tweet</h2><formv-on:submit.prevent="sendTweet"><divclass="form_group"><labelfor="tweet">
Send your tweet
<span> {{ tweetMsg.length + '/' + max_tweet }}</span></label><textareaname="tweet"id="tweet"cols="30"rows="10"v-model="tweetMsg"maxlength="200"></textarea></div><buttontype="submit">Tweet</button></form></div></div><!-- Show all tweets --><divclass="card_tweets"><sectionclass="tweets"v-if="tweets.length > 0"><h2>Tweets</h2><divclass="tweetMsg"v-for="(tweet, index) in tweets"><p>
{{tweet.text}}
</p><divclass="tweetDate"><iclass="fas fa-calendar-alt fa-sm fa-fw"></i>{{tweet.date}}
</div><divclass="tweet_remove"@click="removeTweet(index)"><spanclass="remove">Delete this tweet <iclass="fas fa-trash fa-xs fa-fw"></i></span></div></div></section><divv-else>No tweets to show</div></div></div><scriptsrc="./main.js"></script></body></html>
JavaScript file
let app =newVue({
el:'#app',
data:{
userData:{},
usersID:0,
name:"",
email:"",
password:"",
max_length:25,
max_pass_length:16,
max_tweet:200,
error:"",
registered:false,
tweetMsg:"",
tweets:[]},
methods:{registerAccount(){if(this.name.length >0&&this.name.length <=this.max_length &&this.email !==""&&this.password !==""){this.userData.id =++this.usersID,this.userData.name =this.name,this.userData.email =this.email,this.userData.password =this.password
this.registered=true;}else{this.error ="Complete all the form fields"}/* Add registration data to the local storage */
localStorage.setItem('simple_tweet_registered',true)/* Add the whole userData object as JSON string */
localStorage.setItem('simple_tweet_registered_user',JSON.stringify(this.userData))/* Clear the registration inputs */this.name ="";this.email ="";this.password ="";},sendTweet(){this.tweets.unshift({
text:this.tweetMsg,
date:newDate().toLocaleTimeString()});this.tweetMsg ="";//console.log(this.tweets);
stringTweets =JSON.stringify(this.tweets)//console.log(stringTweets);
localStorage.setItem('simple_tweet_tweets', stringTweets)},removeTweet(index){let removeIt =confirm("Are you sure you want to remove this tweet?")if(removeIt){this.tweets.splice(index,1);/* Remove the item also from the local storage */
localStorage.simple_tweet_tweets =JSON.stringify(this.tweets)}}},created(){/* Check if the user is registered and set the registered to true */if(localStorage.getItem("simple_tweet_registered")==='true'){this.registered =true;}if(localStorage.getItem('simple_tweet_registered_user')){this.userData =JSON.parse(localStorage.getItem('simple_tweet_registered_user'))}/* Parse all tweets from the local storage */if(localStorage.getItem("simple_tweet_tweets")){
console.log("There is a list of tweets");this.tweets =JSON.parse(localStorage.getItem('simple_tweet_tweets'))}else{
console.log("No tweets here");}}});
We are ready to move forward with our Vue journey. Now it's time to learn about components.
Vue Component Basics
A component is a reusable block of code that represents a specific element on the page.
Every web page and web or mobile application can be divided into components. Starting from the main sections we can further divide these into smaller bits and make sub-components.
Every component is reusable and is made of dedicated HTML, CSS, and JavaScript code.
We can use components to organize our code and build complex layouts that are easily maintainable.
Looking at a simple web page, it is usually made of a header, the main content area, and a footer. But each of these three pieces can be sub-divided into smaller parts.
For instance, a header can have the main navigation menu, a secondary menu, and a hero image. The same is true for the main and footer areas.
You can watch the video on YouTube here or at the end of this section to review. You can also view the repository here.
To get started with components, we first need to learn how to register them, pass them data, and then we need to learn how to use them. Here are some great overviews of these topics to get you started:
To register a component, we need to use the component method on the Vue() object. After calling this function we need to define a template property with some markup specific to the component.
However, our component will always render the same content, I am a component. Let's make it more useful and, following our tweets example, build a tweet message component.
Vue.component('tweet-message',{
template:`
<div>
<p> Tweet text goes here </p>
<p> Date of the tweet goes here</p>
</div>
`});
OK, now that we have the base for our component we need to actually pass data to it.
One thing to notice here is that every component requires a single root element inside the template property. So, since we have two paragraphs, we wrapped them inside a div that will be considered the root element of our component.
Inside it, we can put whatever we want to build our custom component.
Let's move on to the next step and pass some data to the component.
How to use props in Vue
Now, given what we've learned so far, we want to pass data to our component as we did previously to bind data between the Vue instance and the markup file via the moustache syntax.
However, with components things work a bit differently. We use props to create a binding between our component and its template.
The props property can be defined as an array or as an object.
When used as an array, we can specify the properties as strings inside the array and these can later be used inside the component like we usually do.
When we use an object we can pass the prop as the key and its type as the value. That will help to make sure that the exact data type is passed to our component.
Once we have defined our properties, we can use them as HTML attributes and pass them the data we want our component to render onto the page.
For instance, we can use the component above to show a bunch of tweets using our newly created component.
<!-- Manually pass the data to the tweet message component --><tweet-messagetext="This is a component"date="25/12/2020"></tweet-message><tweet-messagetext="This another component"date="26/12/2020"></tweet-message><tweet-messagetext="This another component"date="27/12/2020"></tweet-message><!-- Pass a javascript expression to the date property of the tweet message component --><tweet-messagetext="This another component":date="new Date().toLocaleString()"></tweet-message>
The first examples will render the string we passed between quotes. But
to render the computed result of the new Date() instance we will need to use the v-bind directive so that its content is interpreted as JavaScript code.
So far we have seen that we can bind data by defining properties inside the data object on a Vue instance.
When working with components the data object is not available as an object but as a function. This function can return an object with properties. This will make each component's instance unique and independent from the others.
Following our previous example, let's add a couple of CSS classes to our component.
First, we will edit our component template and bind the class attribute to a data property. Then we will create our data object.
Now our template will look for two data properties, tweetBoxWrapper and dateClass, that we can later use inside our CSS to add some style to our elements. Let's add the data function now.
Vue.component('tweet-message',{
props:{
text: String,
date: String
}
template:`
<div :class="tweetBoxWrapper">
<p> {{text}} </p>
<p :class="dateClass"> {{date}}</p>
</div>
`,data(){return{// Data properties go here
tweetBoxWrapper:"tweet-message",
dateClass:"tweet-date",}}});
Another thing we can do is to define a data property and use it inside our template, for instance, to dynamically show the current date. We can define a now property and use it in the template like we previously did with the date property:
In the example above we have used both props and data. We can use the prop text as an attribute when we use our component <tweet-message text="This is a component"></tweet-message>. The properties we returned in the data method are bound to the template and will render the information we specify right there in the data method.
When inside the data method, we need to remember that props defined here are accessible using the this keyword.
So if we want to store the value of the text prop inside a property in the data object, we can grab it like this:
There are situations when we just don't know or want to strictly define what goes inside a component. Or we might want to let the user decide its content when they use our component.
In such cases, we can use slots when we declare the template of our component.
Let's imagine that we have another component that we want to use to divide tweets into different sections.
Our new component can be as simple as that, a div with a class tweet_section, an h2 that binds to a prop, and a slot. The slot means that inside our component we can put whatever we want, like nesting other elements and even other components.
<tweet-sectiontitle="Latest Tweets"><tweet-messagetext="This is my first tweet"></tweet-message><tweet-messagetext="This is my second tweet"></tweet-message><tweet-messagetext="This is my third tweet"></tweet-message><tweet-messagetext="This is my fourth tweet"></tweet-message></tweet-section><tweet-sectiontitle="Most popular"><h3>Trendy in IT</h3><tweet-messagetext="This is a very popular tweet"></tweet-message><tweet-messagetext="This is another popular tweet"></tweet-message></tweet-section>
We've barely scratched the surface here, but with what we know we can already modify our simple_twitter application to use components. Along the way, we will also learn how events work inside components.
How to Update Your Simple_twitter Project with Components
Now that we have a basic understanding of components, we can update the simple Twitter project we built in the previous videos and use components to make our code better.
We need to do a few things to make this happen, and create a component:
We need to decide what component we want to build
We need to extract the code from the markup and place it in the template property
We need to refactor our code to make the component work.
You can watch the tutorial on YouTube here
or checkout the repository here.
Let's say we want to create a component for the tweet message.
How to create the component
Let's create a component for a tweet message like this:
Vue.component('tweet-message',{
template:``});
How to move the tweetMsg element
Then we have to move the tweetMsg element inside the template property of our component:
After that, we need to update the template because the v-for directive now is useless. So we will remove it and add it back later when we are ready to use the component.
Given that we will not have a v-for directive at this point, we still want to use the tweet variable to grab the tweet, so we will pass it as a props.
There is also an event listener that needs to change to let our application work as expected.
<divclass="tweet_remove"@click="removeTweet(index)"><spanclass="remove">Delete this tweet <iclass="fas fa-trash fa-sm fa-fw"></i></span></div>
The code here <div class="tweet_remove" @click="removeTweet(index)"> listens to click events so the user can remove a tweet by clicking on it.
This will need to go, and we need to replace it with a special method of the Vue instance called $emit(). Our component instance will need to communicate with the parent instance and tell it that it wants to trigger the remove tweet method.
To solve this problem, Vue provides a custom events system. It allows us to use the v-on directive to listen not only to native DOM events but also to custom events defined at the component level.
Let's break this down: we keep using the v-on directive in its short form @. Then we use the Vue $emit method to define a custom event that our component will emit when we click on this element.
To the $emit method we pass two parameters, the first is the name of the custom event remove-tweet, and the second is a parameter that we want to pass to the event listener when we use index. That will be the index of the element we want to delete.
So that the parent instance can listen to our event, trigger the removeTweet method we defined in the main Vue instance and remove the correct tweet.
<!-- Show all tweets --><divclass="card_tweets"><sectionclass="tweets"v-if="tweets.length > 0"><h2>Tweets</h2><tweet-messagev-for="(tweet, index) in tweets"v-bind:tweet="tweet":key="index"@remove-tweet="removeTweet(index)"></tweet-message></section><divv-else>No tweets to show</div></div>
Now that we've completed our first project, let's learn how to make an API request and how to use the GitHub API to build our final portfolio.
How to Perform API Calls with Axios
For our next project, I have created a simple but nice design using Figma that we will use to kick start our portfolio.
Our portfolio will use the GitHub's rest API to pull projects and fill out the design.
"A REST API is a software architectural style that enables the requesting system to access and manipulate a textual representation of web resources."
What this means is that our Vue application (the requesting system) will request a textual representation from GitHub of our repositories that we can use later and manipulate to showcase our projects inside our portfolio.
For our final project, we will use a library called Axios that will help us make HTTP requests to the GitHub API.
We can install Axios inside our project in multiple ways. For our example we will keep things simple and use the CDN.
There are also other methods you can use to install Axios. The official documentation for Axios is available here
and you can read about how to consume the API in the documentation here.
How to install Axios via CDN
So let's get started and install Axios via the CDN. We will use the UNPKG CDN and insert a script tag inside our main HTML file.
This CDN will always provide the most up to date version of Axios. Alternatively, we can also specify a different version number.
Let's start by inserting the following script in an index.html file that we will use to send our first HTTP request to the GitHub API.
<!DOCTYPE html><htmllang="en"><head><metacharset="UTF-8"><metaname="viewport"content="width=device-width, initial-scale=1.0"><title>VueJS / GitHub API</title></head><body><divid="app"></div><!-- Axios latest version CDN --><scriptsrc="https://unpkg.com/axios/dist/axios.min.js"></script><!-- VueJS development version --><scriptsrc="https://cdn.jsdelivr.net/npm/vue/dist/vue.js"></script><scriptsrc="./main.js"></script></body></html>
The code above is nothing new, but let's look at it piece by piece.
We have a basic HTML structure. Before the closing body tag, we've placed two script tags, one for Axios and one for VueJs.
In the body, we created a root element for the Vue application that we called #app.
Finally, before the end of the body tag, we placed a new script tag that points to the file where we will write our code, the main.js file.
Now we have all the building blocks to make our first API call and request data from the GitHub API.
But before that let's quickly see what an HTTP request actually is and what kind of requests we can make.
What is an HTTP request?
HTTP stands for Hypertext transfer protocol. It is an application-layer protocol designed for communications between two points:
a web client (the browser)
a web server
This protocol allows transmission of data like HTML files and. It defines verbs also known as methods that you can use to perform specific actions on a given resource.
The method or verb that we will use for our project is the GET method, that, as you might have guessed, is used to obtain or to get
a resource from the webserver.
We have also other methods:
GET (retrieves data)
POST (sends data)
PUT (updates the entire representation of the data)
PATCH (similar to put but used to partially update data)
DELETE (removes data)
Each of these requests performs a specific action on a resource, but there are also other verbs like the HEAD, OPTIONS, CONNECT, and TRACE.
I won't cover HTTP in detail here as it's out of the scope of this guide. But below there are some links to documentation pages
related to this topic if you want to find out more.
We will use the GET method to perform get requests from the GitHub API. All data we want to request are publicly accessible (the public repositories of a user), therefore we don't have to authenticate our application.
But unauthenticated requests are limited. For the scope of this tutorial, this is perfectly fine. If you plan to put this in production then you might want to look at how to make authenticated requests and obtain an API key from GitHub.
GitHub provides clear and in-depth documentation about its Rest API, including a list of resources that you can request along with their endpoints. We will use the "List repositories for a user" resources available here.
Let's look at the documentation. The first thing we notice is that GitHub gives us a GET endpoint where we can send our HTTP requests /users/{username}/repos.
The placeholder {username} needs to be replaced with the actual username of the user we want to request the list of public repositories from.
From the documentation, we also see that there are other parameters that we can use to refine our request. We will use username that goes in the path and needs to be a string as described in the parameters table under Type.
We can also use the per_page and page parameters to paginate our results.
Let's make the first request and see what we get.
Inside our main.js file, we will create a new Vue instance and add a mounted lifecycle hook where we will perform the HTTP request using Axios.
Let's break this code down. First, we have created a new Vue instance. Then we used the el property and assigned it a root HTML element.
Then we have defined a data object and the properties that we will use later to perform the HTTP request and handle the response.
After the data object, we have defined a lifecycle hook that will use to run our code once the root element has been mounted.
Inside the mounted method, it's time to use Axios and perform an HTTP request.
Axios is a promise-based HTTP client. When we use the get method to request our data from the GitHub API it will return a promise that needs to be handled.
We do this using the syntax axios.get() to perform the request, then we handle its response using the .then() method on the promise.
If our request fails the .catch() method will handle the error and, in this case, show the error message on the console.
Promises are out of the scope of this guide, but if you want to learn more, you can check out this detailed article here.
Inside the .get() method we have put the URL including a query string that uses per_page and page parameters to submit our request. Inside the .then() method we handled the response. The response parameter is given to us by the promise and we use an arrow function to handle it.
The get method returns a promise. Here we simply handled its response with an arrow function where response is the return value that we obtained by calling axios.get().
We logged the response object to the console. Then we assigned its content, the response.data, to our projects property so that we can later retrieve each project and show them onto the page as usual with a v-for directive.
How to show each project
Now it's time to show our projects inside the portfolio. We can do that with the v-for directive.
The projects property in this case contains an array of objects. Each object has its properties that we can use to populate our template.
<divid='app'><divv-for="project in projects"><h2class="title">{{project.full_name}}</h2><divclass="author"><imgwidth="50px":src="project.owner.avatar_url"alt="me"></div><divclass="view"><a:href="project.html_url">View</a></div></div></div>
Here we use the v-for directive to loop over the array of projects.
Now the project variable contains an object that represents a single repository from the GitHub account.
Looking at the response object we know that we can grab a number of properties. So we picked full_name, the full name for the repository, owner.avatar_url, the URL of the profile's avatar, and html_url that is the actual URL of our repository. That's all we need for now.
If we now look at the page we will immediately see all repositories from our account.
Now that we know how to make an HTTP request with Axios and get data from GitHub, we are almost ready to start building our portfolio.
In the next section, we are going to look at another Vue library called Vue-router that we will use in our final project.
How to Handle Routing with VueRouter
Our portfolio will surely have more than one page, so we need a system that understands where to send the user when, for instance, they click a link in the navbar for a specific page.
For that Vue has an official routing package that can help us do just that and build a single page application.
A single page application is an application that doesn't refresh the page when a user visits a new page so that the user experience is more fluid.
As for Vue and Axios, we need to install this library and we do that via its CDN. But as always, there are also other methods depending on your needs. I just want to keep things simple for now, so let's start by placing the CDN script tag inside the HTML file and learn the basics of this new library.
You can watch the tutorial on YouTube here
and checkout the repository on BitBucket.
You can also see the Vue Router Documentation here.
How to install Vue Router via CDN
Let's take our previous example index.html and after the VueJS CDN will point to the router https://unpkg.com/vue-router@3.4.9/dist/vue-router.js.
<!DOCTYPE html><htmllang="en"><head><metacharset="UTF-8"><metaname="viewport"content="width=device-width, initial-scale=1.0"><title>VueJS / GitHub API</title></head><body><divid="app"><divv-for="project in projects"><h2class="title">{{project.full_name}}</h2><divclass="author"><imgwidth="50px":src="project.owner.avatar_url"alt="me"></div><divclass="view"><a:href="project.html_url">View</a></div></div></div><!-- Axios latest version CDN --><scriptsrc="https://unpkg.com/axios/dist/axios.min.js"></script><!-- VueJS development version --><scriptsrc="https://cdn.jsdelivr.net/npm/vue/dist/vue.js"></script><!-- Vue Router CDN --><scriptsrc="https://unpkg.com/vue-router@3.4.9/dist/vue-router.js"></script><!-- Main scrip file --><scriptsrc="./main.js"></script></body></html>
How to use Vue Router
Now our app has access to the router system and we can add a couple of routes for our application.
We can do so using the router-link component provided by the library and its to attribute to point the link to a specific page.
<!-- Create a router link using the 'router-link' component and set the path using the 'to' attribute --><header><nav><router-linkto="/">Home</router-link><router-linkto="/projects">Projects</router-link></nav></header><!-- Render the component for the corresponding route --><router-view></router-view>
We also used the router-view component that will render a specific component for each route.
Now we need to do something inside our JavaScript file to make this work.
Let's see the steps we need to take:
Define route components
Define routes
Create a Vue router instance
Create and mount the Vue root instance.
First, we need to define our components that we'll use from each route to render the content of the page.
We will create two components, one for the home page and one for the projects page.
To simplify the steps, we will keep everything in the same file and refactor later on.
Let's create the first two basic components to see if the router works:
Now let's follow the remaining steps and define the routes, create the vue router instance, and create and mount the Vue root instance.
// Define some routesconst routes =[{path:'/', component: Home},{path:'/projects', component: Projects}];// Create the router instance and pass the routes to itconst router =newVueRouter({
routes: routes
});// Create and mount the root instance.let app =newVue({
router
}).$mount('#app');
That's it. If you visit the homepage you will see two navigation links and the site content will change accordingly.
Let's put it all together and start building our portfolio.
From the previous example in the Axios section, we requested from the GitHub API all public repositories for a user and rendered name, user avatar, and project URL onto the page.
Let's move some of that logic inside our application that uses routes.
The main changes that we need to make here are:
move the HTML markup inside the template property of the project's component
move the data properties inside the data object of the component
move the code we wrote in the mounted hook inside our component.
The final code looks something like this:
// Define route componentsconst Home ={template:'<div>My Portfolio</div>'}const Projects ={
template:`<div>
<div v-for="project in projects">
<h2 class="title">{{project.full_name}}</h2>
<div class="author">
<img width="50px" :src="project.owner.avatar_url" alt="me">
</div>
<div class="view">
<a :href="project.html_url">View</a>
</div>
</div>
</div>`,data(){return{
projects:[],
perPage:20,
page:1}},mounted(){
axios
.get(`https://api.github.com/users/fabiopacifici/repos?per_page=${this.perPage}&page=${this.page}`).then(response=>{//console.log(response);this.projects = response.data;}).catch(error=>{console.log(error);})}}// Define some routesconst routes =[{path:'/', component: Home},{path:'/projects', component: Projects}];// Create the router instance and pass the routes to itconst router =newVueRouter({
routes: routes
});// Create and mount the root instance.let app =newVue({
router
}).$mount('#app');
Now that we have a base to work with, let's improve it. We will use a design prototype I made using Figma and add some functionalities to our portfolio to make it look nice.
Final Project – How to Build a Portfolio with VueJS, VueRouter, Axios, GitHub API and deploy to Netlify
We are ready to build our final project! For our Vue-folio, we will start from where we left off in the previous section.
We will build a single-page application that has two routes, one for the home page and one for the projects page.
The index.html file is a little different from what we had in the previous section. Here, we will place only the router-view component that is responsible for showing the component matching a given route.
Then we will place the actual route-links inside each component to make sure we have the desired result as per the design.
Inside the main.js file, we have the core of our single page application.
Here we will define the route components that need to be rendered for each view/page, the homepage, and projects components.
Then we will define two routes, one for the homepage and one for the projects page, create a router instance, and pass it to the routes. Finally, we will create a new Vue instance and pass to it the router instance and mount the root HTML element.
Let's break it down. First, we create a Home constant that will hold the router component object.
Inside the object, the only thing we will put is the template property with some markup to render our page. The main thing to notice here is the router-link component that will point to the /projects route from the homepage.
Next, let's create a route component for the projects page. We have a lot to do here so for now let's just add some boilerplate code – we will come back to it later and write out step by step all the logic.
const Projects ={
template:`<div>
<h1>Projects</h1>
</div>`,data(){return{// Data object here}},
methods:{// All methods here},mounted(){// Lifecycle hook }}
The Projects route components have a template property that so far holds a basic markup that only spit out an h1 title.
After that there is the component's data method that returns an empty object, then an empty methods object and an empty lifecycle hook.
That's all we need, for now, so let's move on and define the rest of the building blocks, the routes, the router and the Vue instances.
How to define the routes, router, and Vue instance
Now that we have two components to render on our main pages we can move forward to the next steps:
define routes
create the router instance
create and mount the Vue instance
First, let's define our two routes and link the components.
In the code, we have defined a new constant called routes. In it, we defined two routes as an array of objects.
Each object has two properties:
path
component
The first object is for the homepage. Its path will respond to requests made to our website base URL, like https://fabiopacifici.com/.
Then the component property links this page to the route's component called Home that we defined in the previous step.
The second object is for the projects page. The path responds to requests made to /projects and it's linked to the Projects route component.
Now that we have our routes:
// create the router instanceconst router =newVueRouter({
routes
})
Above we used the ES6 syntax that allows us to just put the name of the variable holding the routes since it is equal to the name of the property that we needed to use. It's actually the same as writing routes: routes.
Now, we create a Vue instance. Inject the router instance inside it and finally mount the root element.
// create and mount the vue instanceconst app =newVue({
router
}).$mount('#app');
Done! We now have everything in place to start building our portfolio and complete the Projects route component.
How to Build the Main Projects Route Component
We will start working on the data object. Here we need to define properties that will hold all our projects once we fetch data from the git hub API.
The data object
To keep things easier I have intentionally limited results to 20. If you feel this isn't enough you can change the code as you like.
You can implement pagination for your results by increasing the page property that will be passed to the query string or return more results per page by increasing the value of the perPage property.
As we learned in the section where we used Axios to fetch data from the GitHub REST API, there are a few properties we need to define.
The component's data function returns an object with a projects property where we will store all projects we fetch from GitHub.
Then we add a projectsList property that holds only a few projects at a time. We will use this property later to implement a very simple
load more feature in combination with the projectsCount property.
Then we have a skills property where we will store all languages used to build our projects.
We'll use the perPage: 20 and page: 1 properties to build the query string used to fetch data from GitHub. It will take 20 projects and
return only the first page of results unless we change these values.
Finally, we have a loading: true property that we will use to check if the page is fetching data and an errors: false property that shows an error message in case we are unable to connect to the GitHub server.
In the next step, we will start working on all methods required to make our application work.
The fetch all data method
The first method is the one we will use to fetch data from GitHub.
This method will make the Ajax call to the GitHub rest API using Axios and store the response in a property of the Vue instance:
We chained a .catch method to handle an error in case we are unable to connect to the rest API and fetch data. We will log the error to the
console and update the value of the errors property to true so that we can show a custom error message to the user later on.
Finally, we chained the .finally() method that will be executed after the response has been handled. We also updated the loading property and set it to false so that we can show the results to the user.
Inside the finally method we can also call a method (that we still have to create) and that we will use to slice the results later.
Let's build it.
The get projects method
This method takes a portion of the projects we actually stored in the projects property. We can use the projectsList property to store the slice and later implement a method to increment them with a show more button.
The getProjects method takes a portion of all projects stored in the projects property using the array slice method in conjunction with
the property projectsCount that is set to five. So it will store in there only the first five results and return them.
To add five more projects to the projectsList property we will also need a method that the user can call when he clicks on the load more button. Let's create it.
The load more projects method
The load more method will first check if the length of the projects array is less than or equal to the length of the projectsList array. Then, if not, it will increment the value of the projectsCount property by five and then take a bigger slice from the projects property.
In the template property of the Projects component, we can start with the header section. We'll also put in there two router-link components for the pages navigation:
`<div><headerid="site_header"class="container d_flex"><divclass="bio__media"><imgsrc="./assets/img/avatar.svg"alt=""><divclass="bio__media__text"><h1>John Doe</h1><h3>Python Expert</h3><p>Lorem ipsum dolor sit amet consectetur adipisicing elit. </p></div></div><nav><router-linkto='/'>Home</router-link><router-linkto="/projects">Project</router-link><ahref="https://"><iclass="fab fa-github fa-lg fa-fw"></i></a></nav></header></div>
Next, we can continue working on the template and create the main section.
We will put the following markup always in the main template div, right under the header closing tag.
Let's start by placing the main container:
<mainclass="container"><!-- Show an error message if the REST API doensn't work --><!-- Otherwise show a section for our portfolio projects and skills section--></main>
Inside the container, let's use the v-if-else directives to show an error message or the projects section:
<!-- Show Errors if the rest api doesn't work --><divclass="error"v-if="errors">
Sorry! It seems we can't fetch data righ now 😥
</div><!-- Else show the portfolio section --><sectionid="portfolio"v-else></section>
To make the code work, we used the v-if directive and passed to it the errors property. This property will be set to true if there is an error while we fetch data from GitHub or will be set to false if everything is ok. So the v-else directive will render the portfolio section.
Next, we need to show a 'loading...' message while we fetch data. When done we can use the v-for directive to loop over the results. So right in the portfolio section, we will write another v-if-else directive.
<sectionid="portfolio"v-else><!-- Use a v-if directive to show the loading message --><divclass="loading"v-if="loading">😴 Loading ... </div><!-- use a v-for directive to loop over the projectsList array --><divv-for="project in projectsList"class="card__custom"v-else></div></section>
Here we use the v-if directive <div class="loading" v-if="loading">😴 Loading ... </div> to render a loading message. After that the <div v-for="project in projectsList" class="card__custom" v-else></div>
has two directives, the v-for directive that we use to loop over the projectsList property and a v-else directive that will show this element when we are done fetching data from GitHub.
Now we can use the project variable to render all project details in our markup:
<!-- use a v-for directive to loop over the projectsList array --><divv-for="project in projectsList"class="card__custom"v-else><divclass="card__custom__text"><div><!-- Create a custom method to trim the project name so that it doesn't break the design --><h3>{{project.name}}</h3><!-- Create a custom trimmedText to trim the description --><p>{{project.description}}</p></div><divclass="meta__data d_flex"><divclass="date"><h5>Updated at</h5><div>{{new Date(project.updated_at).toDateString()}}</div></div><imgclass="avatar":src="project.owner.avatar_url"></div></div><divclass="card__custom__img"></div><divclass="card_custom__button"><a:href="project.html_url"target="_blank">
Code
</a></div></div>
To render the project title and desciption we used the propeties poject.name and project.description. But the description and the title will break our design unless we trim them at some point.
Next in the element with class date we rendered the poject data in a readable fomat using the new Data().toDateString() method.
To render the user avatar <img class="avatar" :src="project.owner.avatar_url"> we used the shortcut for the v-bind diective so that we could use the property project.owner.avatar_url to grab the avatar URL.
Finally, to render a button that once clicked redirects the user to the repository page we bound the href attribute to the project.html_url property <a :href="project.html_url" target="_blank">Code</a>.
Our project card is complete. The next thing we need to do is render a load more button to show more projects.
We are still working inside the projects section. Right after the project card we can write the following markup
<!-- Render a load more button --><divstyle="text-align: center; width:100%"v-if="!loading"><divv-if="projectsList.length < projects.length"><buttonclass="btn_load_more"v-on:click="loadMore()">Load More</button></div><divv-else><ahref=""target="_blank"rel="noopener noreferrer">Visit My GitHub</a></div></div>
The v-if directive first checks if the loading property is set to false.
If so, we'll use another v-if directive to check if the length of property projectsList is less than the length of the property projects.
If so, it will show a button that uses a v-on directive to listen for clicks <button class="btn_load_more" v-on:click="loadMore()">Load More</button> and trigger a loadMore() method. Otherwise, we show a link to the GitHub account.
After this, we can show a list of skills related to all the projects:
<!-- Show a skills section --><divid="skills_section"><h2>Development Skills</h2><ulclass="skills"><!-- Loop over the skills property --><liv-for="skill in skills">{{skill}}</li></ul></div>
Our markup is complete, but we need to improve our code a little as the project title and its description are breaking our design!
Let's create two methods, one to trim the title and one for the description text.
The trimText and trimTitle methods
The trimTitle method will replace all - and _ with a space, and restrict the number of characters to 12. The trimText method instead only reduces the number of characters of the description in excess of 100 characters.
With these two methods, now we can update the markup and use them to make sure nothing breaks the design.
Let's update these two lines that will be changed from this:
<!-- Create a custom method to trim the project name so that it doesn't break the design --><h3>{{project.name}}</h3><!-- Create a custom trimmedText to trim the description --><p>{{project.description}}</p>
Let's put eveything together. The final markup will be the following:
<div><headerid="site_header"class="container d_flex"><divclass="bio__media"><imgsrc="./assets/img/avatar.svg"alt=""><divclass="bio__media__text"><h1>John Doe</h1><h3>Python Expert</h3><p>Lorem ipsum dolor sit amet consectetur adipisicing elit. </p></div></div><nav><router-linkto='/'>Home</router-link><router-linkto="/projects">Project</router-link><ahref="https://"><iclass="fab fa-github fa-lg fa-fw"></i></a></nav></header><mainclass="container"><divclass="error"v-if="errors">
Sorry! It seems we can't fetch data righ now 😥
</div><sectionid="portfolio"v-else><divclass="loading"v-if="loading">😴 Loading ... </div><divclass="projects"v-else><divv-for="project in projectsList"class="card__custom"><divclass="card__custom__text"><div><h3>{{trimedTitle(project.name)}}</h3><p>{{trimedText(project.description)}}</p></div><divclass="meta__data d_flex"><divclass="date"><h5>Updated at</h5><div>{{new Date(project.updated_at).toDateString()}}</div></div><imgclass="avatar":src="project.owner.avatar_url"></div></div><divclass="card__custom__img"></div><divclass="card_custom__button"><a:href="project.html_url"target="_blank">
Code
</a></div></div><divstyle="text-align: center; width:100%"v-if="!loading"><divv-if="projectsList.length < projects.length"><buttonclass="btn_load_more"v-on:click="loadMore()">Load More</button></div><divv-else><ahref=""target="_blank"rel="noopener noreferrer">Visit My GitHub</a></div></div><divid="skills_section"><h2>Development Skills</h2><ulclass="skills"><liv-for="skill in skills">{{skill}}</li></ul></div></div></section></main></div>
There is one last thing to do. Since fetching data from GitHub is very fast we don't really see the loading message. Let's set a timeout and delay it by a few seconds – then you can tune it as you like.
The mounted lifecycle hook
 mounted(){

        setTimeout(this.fetchData, 3000 );

    }
Inside the mounted lifecycle hook we used setTimeout() and called the fetchData method as the first parameter. Then for the second parameter we specified that this method should be executed after 3000 milliseconds (3seconds).
You need to execute the commands above in a termial, so you need to have git installed on you system. If you don't, you can read about how to do that here.
With the first command, we navigate to the project folder called vue-folio. Then we initialise a git repository, add all files to the staging area, and commit the files.
Repeat the steps above for both projects folders.
Create a BitBucket or GitHub repository
I assume you already have an account with GitHub o BitBucket. But if you don't, then go over and create one.
Follow the steps in the video to create the repositories and connect them with you local repositories.
Create an account with Netlify and create a site
You can use Netlify's free plan for private projects, hobby websites, and experiments. It's a perfect fit for our tutorial.
Follow the steps in the video to deploy your projects there.
What's Next?
In an upcoming tutorial I'll show you also how to test your code, upgrade to Vue3, and more.
Thank you for reading!
I hope you enjoyed this tutorial and the accompanying videos. If so, please share the article and hit the like button on the videos. You can also enable notifications by clicking on the bell icon to know when my next video is online.
If you have any questions please just reach out to me. I reply to all YouTube comments.
Dont forget to subscribe to my YouTube Channel here.
Tetris Game from python
The Tetris Class
We first initialize the Game with some variables:
class Tetris:
    level = 2
    score = 0
    state = "start"
    field = []
    height = 0
    width = 0
    x = 100
    y = 60
    zoom = 20
    figure = None
where the state tells us if we are still playing a game or not. The field is the field of the game that contains zeros where it is empty, and the colors where there are figures (except the one that is still flying down).
We initialize the game with the following simple method:
class Tetris:
    ...
    def __init__(self, height, width):
        self.height = height
        self.width = width
        for i in range(height):
            new_line = []
            for j in range(width):
                new_line.append(0)
            self.field.append(new_line)
That creates a field with the size height x width.
Creating a new figure and position it at coordinates (3,0) is simple:
class Tetris:
    ...
    def new_figure(self):
        self.figure = Figure(3, 0)
The more interesting function is to check if the currently flying figure intersecting with something fixed on the field. This may happen when the figure is moving left, right, down, or rotating.
class Tetris:
    ...
    def intersects(self):
        intersection = False
        for i in range(4):
            for j in range(4):
                if i * 4 + j in self.figure.image():
                    if i + self.figure.y > self.height - 1 or \
                            j + self.figure.x > self.width - 1 or \
                            j + self.figure.x < 0 or \
                            self.field[i + self.figure.y][j + self.figure.x] > 0:
                        intersection = True
        return intersection
It is pretty simple: we go and check each cell in the 4x4 matrix of the current Figure, whether it is out of game bounds and whether it is touching some busy game field. We check if self.field[..][..] > 0, because there may be any color. And if there is a zero, that means that the field is empty, so there is no problem.
Having this function, we can now check if we are allowed to move or rotate the Figure. If it moves down and intersects, then this means we have reached the bottom, so we need to “freeze” the figure on our field:
class Tetris:
    ...
    def freeze(self):
        for i in range(4):
            for j in range(4):
                if i * 4 + j in self.figure.image():
                    self.field[i + self.figure.y][j + self.figure.x] = self.figure.color
        self.break_lines()
        self.new_figure()
        if self.intersects():
            game.state = "gameover"
After freezing, we have to check if there are some full horizontal lines that should be destroyed. Then we create a new Figure, and if it already intersects, then game over :)
Checking the full lines is relatively simple and straightforward, but pay attention to the fact that destroying a line goes from the bottom to the top:
class Tetris:
    ...
    def break_lines(self):
        lines = 0
        for i in range(1, self.height):
            zeros = 0
            for j in range(self.width):
                if self.field[i][j] == 0:
                    zeros += 1
            if zeros == 0:
                lines += 1
                for i1 in range(i, 1, -1):
                    for j in range(self.width):
                        self.field[i1][j] = self.field[i1 - 1][j]
        self.score += lines ** 2
Now, we are missing the moving methods:
class Tetris: ... def go_space(self): while not self.intersects(): self.figure.y += 1 self.figure.y -= 1 self.freeze()
As you can see, thego_space method practically duplicates the go_down method, but it goes down until it reaches the bottom or some fixed figure.
And in every method, we remember the last position, change the coordinates, and check if there is an intersection. If there is, we return to the previous state.
PyGame and the Complete Code
We are almost done!
There is some simple logic left, which is the game loop and the PyGame stuff. So, let’s see at the complete code now:
import pygame
import random

colors = [
    (0, 0, 0),
    (120, 37, 179),
    (100, 179, 179),
    (80, 34, 22),
    (80, 134, 22),
    (180, 34, 22),
    (180, 34, 122),
]


class Figure:
    x = 0
    y = 0

    figures = [
        [[1, 5, 9, 13], [4, 5, 6, 7]],
        [[4, 5, 9, 10], [2, 6, 5, 9]],
        [[6, 7, 9, 10], [1, 5, 6, 10]],
        [[1, 2, 5, 9], [0, 4, 5, 6], [1, 5, 9, 8], [4, 5, 6, 10]],
        [[1, 2, 6, 10], [5, 6, 7, 9], [2, 6, 10, 11], [3, 5, 6, 7]],
        [[1, 4, 5, 6], [1, 4, 5, 9], [4, 5, 6, 9], [1, 5, 6, 9]],
        [[1, 2, 5, 6]],
    ]

    def __init__(self, x, y):
        self.x = x
        self.y = y
        self.type = random.randint(0, len(self.figures) - 1)
        self.color = random.randint(1, len(colors) - 1)
        self.rotation = 0

    def image(self):
        return self.figures[self.type][self.rotation]

    def rotate(self):
        self.rotation = (self.rotation + 1) % len(self.figures[self.type])


class Tetris:
    level = 2
    score = 0
    state = "start"
    field = []
    height = 0
    width = 0
    x = 100
    y = 60
    zoom = 20
    figure = None

    def __init__(self, height, width):
        self.height = height
        self.width = width
        self.field = []
        self.score = 0
        self.state = "start"
        for i in range(height):
            new_line = []
            for j in range(width):
                new_line.append(0)
            self.field.append(new_line)

    def new_figure(self):
        self.figure = Figure(3, 0)

    def intersects(self):
        intersection = False
        for i in range(4):
            for j in range(4):
                if i * 4 + j in self.figure.image():
                    if i + self.figure.y > self.height - 1 or \
                            j + self.figure.x > self.width - 1 or \
                            j + self.figure.x < 0 or \
                            self.field[i + self.figure.y][j + self.figure.x] > 0:
                        intersection = True
        return intersection

    def break_lines(self):
        lines = 0
        for i in range(1, self.height):
            zeros = 0
            for j in range(self.width):
                if self.field[i][j] == 0:
                    zeros += 1
            if zeros == 0:
                lines += 1
                for i1 in range(i, 1, -1):
                    for j in range(self.width):
                        self.field[i1][j] = self.field[i1 - 1][j]
        self.score += lines ** 2

    def go_space(self):
        while not self.intersects():
            self.figure.y += 1
        self.figure.y -= 1
        self.freeze()

    def go_down(self):
        self.figure.y += 1
        if self.intersects():
            self.figure.y -= 1
            self.freeze()

    def freeze(self):
        for i in range(4):
            for j in range(4):
                if i * 4 + j in self.figure.image():
                    self.field[i + self.figure.y][j + self.figure.x] = self.figure.color
        self.break_lines()
        self.new_figure()
        if self.intersects():
            self.state = "gameover"

    def go_side(self, dx):
        old_x = self.figure.x
        self.figure.x += dx
        if self.intersects():
            self.figure.x = old_x

    def rotate(self):
        old_rotation = self.figure.rotation
        self.figure.rotate()
        if self.intersects():
            self.figure.rotation = old_rotation


# Initialize the game engine
pygame.init()

# Define some colors
BLACK = (0, 0, 0)
WHITE = (255, 255, 255)
GRAY = (128, 128, 128)

size = (400, 500)
screen = pygame.display.set_mode(size)

pygame.display.set_caption("Tetris")

# Loop until the user clicks the close button.
done = False
clock = pygame.time.Clock()
fps = 25
game = Tetris(20, 10)
counter = 0

pressing_down = False

while not done:
    if game.figure is None:
        game.new_figure()
    counter += 1
    if counter > 100000:
        counter = 0

    if counter % (fps // game.level // 2) == 0 or pressing_down:
        if game.state == "start":
            game.go_down()

    for event in pygame.event.get():
        if event.type == pygame.QUIT:
            done = True
        if event.type == pygame.KEYDOWN:
            if event.key == pygame.K_UP:
                game.rotate()
            if event.key == pygame.K_DOWN:
                pressing_down = True
            if event.key == pygame.K_LEFT:
                game.go_side(-1)
            if event.key == pygame.K_RIGHT:
                game.go_side(1)
            if event.key == pygame.K_SPACE:
                game.go_space()
            if event.key == pygame.K_ESCAPE:
                game.__init__(20, 10)

    if event.type == pygame.KEYUP:
            if event.key == pygame.K_DOWN:
                pressing_down = False

    screen.fill(WHITE)

    for i in range(game.height):
        for j in range(game.width):
            pygame.draw.rect(screen, GRAY, [game.x + game.zoom * j, game.y + game.zoom * i, game.zoom, game.zoom], 1)
            if game.field[i][j] > 0:
                pygame.draw.rect(screen, colors[game.field[i][j]],
                                 [game.x + game.zoom * j + 1, game.y + game.zoom * i + 1, game.zoom - 2, game.zoom - 1])

    if game.figure is not None:
        for i in range(4):
            for j in range(4):
                p = i * 4 + j
                if p in game.figure.image():
                    pygame.draw.rect(screen, colors[game.figure.color],
                                     [game.x + game.zoom * (j + game.figure.x) + 1,
                                      game.y + game.zoom * (i + game.figure.y) + 1,
                                      game.zoom - 2, game.zoom - 2])

    font = pygame.font.SysFont('Calibri', 25, True, False)
    font1 = pygame.font.SysFont('Calibri', 65, True, False)
    text = font.render("Score: " + str(game.score), True, BLACK)
    text_game_over = font1.render("Game Over", True, (255, 125, 0))
    text_game_over1 = font1.render("Press ESC", True, (255, 215, 0))

    screen.blit(text, [0, 0])
    if game.state == "gameover":
        screen.blit(text_game_over, [20, 200])
        screen.blit(text_game_over1, [25, 265])

    pygame.display.flip()
    clock.tick(fps)

pygame.quit()
Try to copy and paste it into a py file. Run and enjoy the game! :)
And don’t forget to share it with your friends!
WEB DEV ONLY HTML/CSS/JS
Want to learn how to create a website with HTML and CSS?
You’re in the right place. In this guide, we show you all the steps to get from a blank screen to a working website that’s optimized and quite good-looking at the same time.
But first, what is HTML and CSS?
Well, you could just look up both terms in Wikipedia, but those definitions aren’t very reader-friendly. Let’s simplify things a bit:
HTML (Hypertext Markup Language) defines the structure and contents of a web page – where things go, how they are laid out, and what’s on the page
CSS (Cascading Style Sheets) defines the styling/presentation of a web page and the elements on it
You can’t really have one without the other – the two work together to make up the final web page, its design, and the content that’s on it.
Note; when we say “a web page,” what we mean is a single HTML document – a single page that’s part of your website. Whereas, “a website” is the complete thing – your whole site with all its individual web pages.
How to create a website using HTML and CSS (table of contents):
So, the first thing you need even before creating a website with HTML and CSS is a web server (hosting). Don’t worry, though; you don’t have to buy your own machine. Many web hosting companies will sell you a simple hosting service on their machines. Just google for “web hosting” and pick something that isn’t too expensive or check our web hosting reviews.
With the server sorted, the next thing you need is a domain name. The domain name is what the website is identified on the web. For example, this site’s domain name is websitesetup.org.
When you have both a domain name and a server, you can connect the two together.
To have this sorted out with no pain on your end, we recommend signing up with a company like Bluehost.
They will handle all the setup for you. Meaning that they will: (a) set up a hosting account for you, (b)register a domain name on your behalf, (c) configure everything to work together, and (d) give you access to an easy-to-use dashboard.
Go ahead and sign up with any of the web hosting services, we’ll wait. When you’re back and have your web server configured and ready to go, scroll to the next step.
P.S. If you just want to experiment with an HTML website on your computer, and don’t intend to make it public, use a local web server software. The one we recommend and like to use is called XAMPP. It has versions for both Mac and PC, and it’s easy to use. Here’s a guide on how to install it on your computer.
The main element of an HTML structure is an HTML tag.
A tag, for example, looks like this:
<b>SOMETHING</b>
<b>SOMETHING</b>
<b>SOMETHING</b>
Here, we’re dealing with a <b> tag. This one will bold a piece of text that’s between the opening tag (<b>) and the closing tag (</b>). In this case, that piece of text is SOMETHING.
But there are other tags, just to name a few:
<i>...</i> will italicize the text between the opening and closing tags
<u>...</u> will underline it
<p>...</p> is a paragraph of text
<h1>...</h1> is the main header on the page
Apart from those simple tags, there are also more complex tags. For example, if you want to build a list like the following:
<a href="https://websitesetup.org/">This is a link to my homepage</a>
<a href="https://websitesetup.org/">This is a link to my homepage</a>
<a href="https://websitesetup.org/">This is a link to my homepage</a>
Read this to get the full list of HTML tags. It’ll become useful as you’re creating a website with HTML and CSS.
2. Understand HTML Document Structure
Think of your HTML page as if it was built of Legos. You put different bricks on top of one another to end up with a given bigger structure.
But instead of Lego bricks, you get HTML tags…
Here’s the simplest HTML document structure:
<!doctype html>
                <html lang="en">
                  <head>
                    <meta charset="utf-8">
                    <title>Hello, world!</title>
                  </head>
                  <body>
                    <h1>Hello, world!</h1>
                    <p>My first web page.</p>
                  </body>
                </html>
<!doctype html>
<html lang="en">
<head>
<meta charset="utf-8">
<title>Hello, world!</title>
</head>
<body>
<h1>Hello, world!</h1>
<p>My first web page.</p>
</body>
</html>
<!doctype html>
<html lang="en">
<head>
<meta charset="utf-8">
<title>Hello, world!</title>
</head>
<body>
<h1>Hello, world!</h1>
<p>My first web page.</p>
</body>
</html>
You can take the code above, copy and paste it to a new file, save the document as index.html, and it’s going to be a perfectly valid HTML page.
Let’s explain the individual parts of this code:
<!doctype html> – the initial declaration of the document
<html lang="en"> – another declaration; says that what’s to come next is an HTML document written in English
<head> – marks the start of the head section; the head section is where all the basic parameters of the page go; most of those are not going to be shown on the screen; they just define what’s going on under the hood
<meta charset="utf-8"> – defines what character set is used to write the document; no need to spend too much time on this; just use this declaration as is
<title>Hello, world!</title> – the title of the page; this is what people will see in the title bar of their browsers, e.g.:
<body> – marks the start of the body section; this is where all the content of the page goes; it’s the main part of an HTML document; let us emphasize this, this section is where you’re going to be including all the content that’s meant to appear on the page
<h1>Hello, world!</h1> – the main header on the page
<p>My first web page.</p> – a simple paragraph of text
</html> – the closing tag of the whole HTML document
An important note here. Working on an HTML file in a basic text app or a complex text processor like MS Word is not a good experience. To make things easy on yourself, install a HTML editor called Sublime Text. It has versions for both Mac and PC, and it is free.
Why is it better? Among other things, it will colorize the syntax of an HTML file. Meaning, it’ll visually distinguish your HTML tags from text content, tag parameters, and other values. Basically, it’ll all become readable. Here’s what our simple HTML structure looks like in Sublime Text:
Okay, back on topic. You can take that new index.html file of yours, copy it to where the main directory of your web server is, and then see that page by navigating to it through a web browser. Don’t get too excited, though; this page will be rather ugly (see below).
Okay, so the page is ugly, how to make it not so?
3. Get to Know CSS Selectors
Just like HTML has its tags, CSS has selectors.
Selectors describe how a given element should behave appearance-wise. Here’s an example of a CSS selector:
p {
                    font-size: 18px;
                }
p {
font-size: 18px;
}
p {
font-size: 18px;
}
This selector indicates that all HTML <p> tags within the document will have a font size of 18px.
However, a more practical way of using CSS selectors is not to restrict all tags of a given type to a certain styling, but rather create different “classes” and assign them to tags one by one.
For example, a class selector in CSS looks like this:
.normal-text {
                    font-size: 18px;
                }
.normal-text {
font-size: 18px;
}
.normal-text {
font-size: 18px;
}
Notice the dot (.) before the name of the class (normal-text). With the “normal-text” class defined, we can now assign that class to those specific HTML tags that we want to make 18px in size.
For example:
<p class="normal-text">This text is going to be 18px.</p>
<p class="normal-text">This text is going to be 18px.</p>
<p class="normal-text">This text is going to be 18px.</p>
Let’s take one more minute to explain all the elements of that piece of CSS code above:
.normal-text – class definition; everything after the name of the class and between the opening and closing brackets {} defines what the elements assigned to this class will look like
font-size – an example CSS property
18px – a value assigned to the property
There’s a ton of CSS properties apart from the above font-size. Here’s the complete list if you’re curious.
4. Put Together a CSS Stylesheet
An HTML document is very structural – every element has its place, and the order of elements is crucial for the final construction and appearance of the web page in question. A CSS document is a lot less so.
CSS documents are often referred to as stylesheets. Basically, a CSS stylesheet is a list of all the class definitions that are being used in the corresponding HTML document. The order of the class definitions is not that crucial most of the time (at least for simple designs).
The way you put a CSS stylesheet together is by defining each class one by one, and then testing if the outcome in your page design is what you wanted.
This sounds like tedious work, and it is.
But we’ll make things easier on you, and not force you to learn HTML and CSS design by hand. Instead of teaching you everything from scratch, we’ll take a living organism and dissect its elements.
This is where a thing called Bootstrap comes into play.
5. Download/Install Bootstrap
Bootstrap is an open-source toolkit for creating a website with HTML and CSS.
In plain English, Bootstrap takes care of the basic structure of an HTML document and CSS stylesheet for you. It delivers a framework that makes sure that the main scaffolding of your web page is ready and optimized for further development.
Basically, Bootstrap lets you not start from scratch, and instead go right into the fun part. With it, you don’t have to work on the often boring early stages of creating a website with HTML and CSS.
There are two paths you can take:
Option (a): learn Bootstrap – go to the Bootstrap homepage, download the main Bootstrap package and start building on top of it.
Option (b): take a shortcut – get a starter pack for Bootstrap with a good-looking design and a demo web page already built.
Option (a) might have some learning curve at the beginning, but it’s not in any way the worse way to approach creating a website with HTML and CSS. Once you master the core Bootstrap structure, it might be easier for you to build new pages and make them look exactly as you want them. The Bootstrap documentation is a great place to get started with this path.
We’re going to go with Option (b) for this guide. We’re doing this for a couple of reasons, chief of them:
Starting with a ready-made structure saves a lot of pain in trying to figure out the basic necessities of an HTML document. This lets you focus on the interesting stuff – like laying out content and making it look good.
In short, learning things this way will give you a better-looking result quicker, which we guess is what you want.
6. Pick a Design
When you’re creating a website with HTML and CSS, you are free to use any Bootstrap template you like. They should all work similarly enough.
However, for this guide, we’re going to use one of the templates by Start Bootstrap. They have a nice selection of free templates that are optimized, work trouble-free, and are also very well designed.
The theme we’re going to use is called Creative. The final effect we’re going for will look something like this:
To begin with, the Creative template, click on the Free Download button that’s on the right (on this page) and save the zip package to your desktop.
Unzip the package and move its contents to the main directory of your local web server or your web hosting account.
Now open that location through your web browser. You’ll see the stock version of the template:
It’s already quite good-looking, but now it’s time to learn how to use HTML and CSS to make it into exactly what you want it to be.
7. Customize Your Website With HTML and CSS
Let’s work on the homepage of the design first. This is going to show us how to replace the graphics, texts, and tune everything up in general.
We’ve talked about the head section of an HTML document briefly above. Let’s have a more in-depth look into it here.
When you open the index.html file of your Bootstrap site in Sublime Text, you’ll see a head section like this (we removed all the non-crucial things from this code for clarity *):
* Apart from the above, there was also code to load Google Fonts, Font Awesome icons and a lightbox module for the images displayed on the page.
Most of the declarations here we already know, but there are a couple of new ones:
First off, everything between the <!-- ... --> brackets is an HTML comment. It doesn’t show up on the final page.
<meta name="viewport" content="width=device-width, initial-scale=1, shrink-to-fit=no"> – it’s one of Bootstrap’s own declaration tags. It defines the size of the website’s viewport.
<link href="css/creative.min.css" rel="stylesheet"> – this line loads the CSS stylesheet of the Creative template and it also houses the default stylesheet of Bootstrap.
Let’s modify that last declaration – the line loading the CSS – to make it easier to work with later on.
Change that line to:
<link href="css/creative.css" rel="stylesheet">
<link href="css/creative.css" rel="stylesheet">
<link href="css/creative.css" rel="stylesheet">
This is just a small difference – it’ll load the non-shortened version of the same CSS sheet. This version is just easier to modify.
Now scroll down to the very bottom of the index.html file. You’ll see the following lines right before the closing body tag:
They’re responsible for loading JavaScript files that handle some of the more visual interactions of the design. For instance, when you click on the About link in the top menu, you’ll be taken smoothly to the about block on the same page – this, among other things, is done via JavaScript. We don’t need to trouble ourselves understanding this code right now. Let’s leave this for another time.
Instead, let’s work on adding our own content to the page:
8. Add Content and Images
The first thing you’ll want to do is change the title of the page.
1. Change the Title
Find the title tag in the head section and replace the text between the tags to something of your own:
<title>My HTML Site</title>
<title>My HTML Site</title>
<title>My HTML Site</title>
2. Customize the Hero Section
The hero section is what we call this block:
It would be cool to have our own content inside of it. To modify this block, go back to your index.html file and find this section:
This whole block of code controls what’s in the hero section.
There are some new tags here:
<header> – this is a tag defining that this whole section is the header of the page; this tag has a couple of brothers and sisters in the form of the <section> tag and <footer> tag
<div> – is a general CSS tag that indicates that what follows is a separate section (aka division) in the HTML document; using it makes it easier to distinguish individual sections on the page visually
You’ll also notice that some of the other tags (which we already know) look to be a bit more complex, with multiple CSS classes assigned to them. For example:
The classes assigned to the <h1> tag here is text-uppercase text-white font-weight-bold.
These classes have been created by Bootstrap and by the Creative theme’s developer. The good news is that you too can use them freely when creating a website with HTML and CSS.
Quite frankly, you can customize any tag you add to your page’s structure by assigning any number of classes to it.
If you want to see the complete list of the classes available, you can open the main creative.css file that’s in the css subdirectory of the Creative theme.
Getting a grasp of all these classes can seem intimidating at first, but it’s actually way easier than it looks.
For example, one of the classes assigned to some of the paragraphs in our index.html file is font-weight-light. When you jump into the creative.css file and ctrl+f looking for that class name, you’ll see that it simply sets the font-weight parameter like so:
.font-weight-light {
                  font-weight: 300;
                }
.font-weight-light {
font-weight: 300;
}
.font-weight-light {
font-weight: 300;
}
Modifying the default texts in the index.html file is very simple. Just find the tag that you want to edit and change what’s between the opening and closing tags.
For example, to change the main headline, just change this:
<h1 class="text-uppercase text-white font-weight-bold">Admire my HTML website!</h1>
<h1 class="text-uppercase text-white font-weight-bold">Admire my HTML website!</h1>
<h1 class="text-uppercase text-white font-weight-bold">Admire my HTML website!</h1>
You can do the same to all the paragraphs and other tags on the page.
What’s important is that you can also add new paragraphs freely. For example, we can take the paragraph that’s already on the page, make a copy of it and paste it right below the original paragraph; like so:
<p class="text-white-75 font-weight-light">Start Bootstrap can ...</p>
<p class="text-white-75 font-weight-light">Start Bootstrap can ...</p>
                <p class="text-white-75 font-weight-light">Paragraph 2</p>
<p class="text-white-75 font-weight-light">Start Bootstrap can ...</p>
<p class="text-white-75 font-weight-light">Paragraph 2</p>
Now, with the texts taken care of, let’s replace the image that’s in the background.
This is a bit more complicated to do since it requires us to go into the CSS stylesheet file and do the modification there. As you can see in the HTML code of the Masthead section, no tag would indicate including an image to the page in any way. This is all done via CSS.
When you take another look at the whole block of code handling the Masthead section, you’ll see that it’s assigned to a class called masthead. This line of code handles the class assignment:
<header class="masthead">
<header class="masthead">
<header class="masthead">
The masthead class is the one that puts an image in the background of the whole block.
Let’s open the creative.css file again and look for the “masthead” class:
This code does all kinds of fancy things to our image (like adding an overlay, shading, etc.), but the important part is this: url("../img/bg-masthead.jpg"). This is the line that indicates where to find the background image. It’s going to be in the img subdirectory.
To change this background image, take any image of your own, copy it to the img subdirectory and then copy and paste its name in place of the original bg-masthead.jpg file. In short, change this: url("../img/bg-masthead.jpg") to this: url("../img/YOURFILE.jpg").
3. Customize the Other Blocks on the Page
As you go through the index.html file, you’ll notice that there’s a lot of different sections already on the page. We have a section for the navigation, and about a block, some services, a portfolio, a call to action, a contact block, and a footer.
While there’s different content in all these sections, the sections themselves are similar in structure. They all have roughly the same set of HTML tags – just different CSS classes assigned to them.
The best way to modify the page to fit your needs is to go through the blocks one by one and experiment by changing things around.
Apart from modifying the texts, you can also move whole sections around (the parts between the <section> tags). Granted, you do have to do that by hand (by cutting and then pasting elements into place), it still is straightforward to do.
With that being said, there are two quite basic modifications that we haven’t talked about yet. Let’s cover these next:
9. Fine-Tune Colors and Fonts
Changing colors or fonts is very easy to do in HTML and CSS. The simplest thing you can do is assign some in-line styling to an HTML tag. For example:
<p style="color: #FF0000;">Red text</p>
<p style="color: #FF0000;">Red text</p>
<p style="color: #FF0000;">Red text</p>
In HTML, colors are represented by their hex values; “#FF0000” is red. Here’s a table of all the other standard colors.
A better way to assign colors is to do it via the CSS stylesheet. For example, to get the same effect as the code above, we could put this in our CSS stylesheet:
p.red{
color: #FF0000;
}
p.red {
                color: #FF0000;
                }
p.red {
color: #FF0000;
}
And then use the following piece of HTML code in the main document:
<p class="red">Red text</p>
<p class="red">Red text</p>
<p class="red">Red text</p>
That second method is basically how things are done in Bootstrap.
To change the color of any text on the page, first find the tag responsible for styling that text, and then go into the stylesheet and modify the corresponding class, or create a new class.
Here’s an example; say you want to change the color of the header saying “At Your Service.” Currently, it’s black, and this is the code handling it:
<h2 class="text-center">At Your Service</h2>
<h2 class="text-center">At Your Service</h2>
<h2 class="text-center">At Your Service</h2>
To change its color, the best way is to create a new class called, say, .text-orange and set the color value there, like so:
.text-orange {
                  color: #f4623a !important;
                }
.text-orange {
color: #f4623a !important;
}
.text-orange {
color: #f4623a !important;
}
* The !important will make sure that this color setting will overwrite any other color setting that came before it.
Now, we can go back to our header, and change its code to:
<h2 class="text-center text-orange">At Your Service</h2>
<h2 class="text-center text-orange">At Your Service</h2>
<h2 class="text-center text-orange">At Your Service</h2>
With these changes, the header will now be orange:
To change the font and its size, you can do something very similar. But first, an example of what a font definition block looks like in CSS:
load fonts Merriweather, Roboto, and a system-default sans-serif font (read this to learn about web-safe fonts)
set the font size to 18px
This sort of definition can be placed into any CSS class, just like the color definition. Actually, font and color definitions are often found in the same class declarations.
Going back to our previous example, to change the font size for that header that says “At Your Service,” we could first create a class like this:
.text-xxl {
                  font-size: 50px;
                }
.text-xxl {
font-size: 50px;
}
.text-xxl {
font-size: 50px;
}
And then assign this class to the header:
<h2 class="text-center text-orange text-xxl">At Your Service</h2>
<h2 class="text-center text-orange text-xxl">At Your Service</h2>
<h2 class="text-center text-orange text-xxl">At Your Service</h2>
When changing the colors or fonts in your Bootstrap-made template, first look through the CSS stylesheet for classes that might already provide you with alternative sizes or colors. Use those where available.
10. Create Additional Pages
Now that you have the homepage customized, it’s time to start working on some additional pages and then link them to the homepage.
When creating a website with HTML and CSS, you can build any number of sub-pages and then link them all together.
Here are some of the common pages that most websites need:
about page
contact
portfolio
products/services
team
policies (privacy policy, terms, etc.)
1. Start With the Layout
When building a new web page, the first decision you have to make is what you want the layout to be.
When creating a website with HTML and CSS, nothing is stopping you from crafting whatever layout you want. The only difficulty is actually putting it together.
HTML and CSS can be tough to deal with when starting from a blank screen, so we’re going to use Bootstrap here as well. First, we’re going to show you some principles of crafting a layout and then demonstrate how to do it with Bootstrap.
The way you can think of your web page’s layout is to consider it a sequence of individual blocks – one on top of another. Something like this (notice the four distinct blocks):
The great thing about Bootstrap is that it handles the basic layout principles and appearance details for you so that you can just focus on putting those blocks in the right places.
In this section of the guide, we’re going to create a new “about” page.
To begin, we’ll create just a very basic project of the layout. Something like the one above.
there’s a navigation menu at the top,
a full-width headline block below the menu,
the main content section in the middle, boxed in the center of the screen (not full-width),
and a footer.
Now let’s build this layout in HTML.
2. Build a New Page
The easiest way to start working on a new page is to duplicate an existing page and use it as a template. That’s what we’re going to do.
Create a copy of the index.html file and rename it about.html.
Just to make the pages easier to distinguish at this early stage, edit the new about.html file and change what’s in the <title> tag. For example, <title>About Me</title>.
Now let’s go through the file line by line and decide what we’ll leave and what we’ll remove:
The navigation menu (below <!-- Navigation -->). You probably want to keep this section intact, just to make the navigation experience uniform on all pages.
The main hero section (below <!-- Masthead -->). This one we won’t need according to our layout project. You can go ahead and erase the whole section.
The about section (below <!-- About Section -->). We’re going to reuse this section as our main headline block.
The services section, portfolio section, call to action section, and contact section (everything between <!-- Services Section --> and <!-- Footer -->). We don’t need these sections at all. You can go ahead and erase them.
Thefooter section and everything below it (below <!-- Footer -->). This we’ll need to keep.
This makes our current code quite simple. It basically is just this:
<!DOCTYPE html>
                <html lang="en">

                <head>

                <!-- all head definitions ... removed for clarity -->

                </head>

                <body id="page-top">

                  <!-- Navigation -->
                  <!-- actual navigation tags removed for clarity -->

                  <!-- About Section -->
                  <!-- ... -->

                  <!-- Footer -->
                  <!-- ... -->

                  <!-- Bootstrap script imports -->
                  <!-- ... -->

                </body>

                </html>
<!DOCTYPE html>
<html lang="en">
<head>
<!-- all head definitions ... removed for clarity -->
</head>
<body id="page-top">
<!-- Navigation -->
<!-- actual navigation tags removed for clarity -->
<!-- About Section -->
<!-- ... -->
<!-- Footer -->
<!-- ... -->
<!-- Bootstrap script imports -->
<!-- ... -->
</body>
</html>
<!DOCTYPE html>
<html lang="en">
<head>
<!-- all head definitions ... removed for clarity -->
</head>
<body id="page-top">
<!-- Navigation -->
<!-- actual navigation tags removed for clarity -->
<!-- About Section -->
<!-- ... -->
<!-- Footer -->
<!-- ... -->
<!-- Bootstrap script imports -->
<!-- ... -->
</body>
</html>
The thing that we’re missing here is the main content section. To build it, we’re going to reuse the about section.
Go ahead and make a copy of the about section. This one:
<!-- Main Content Section -->
                <section class="page-section bg-primary" id="main-content">
<!-- Main Content Section -->
<section class="page-section bg-primary" id="main-content">
Since we don’t need the <h2> header there and the <hr> element, let’s just remove them. The only thing left inside this whole block is going to be a paragraph of text. Like so:
When you save the file and navigate to it via your browser, you’ll see that you basically have two very similar blocks one below the other, with the same color background:
It’d be better to have a white background in the main content section. To change it, the only thing we need to do is remove the bg-primary class from the main <section> tag. In other words, make the tag into this:
<section class="page-section" id="main-content">
<section class="page-section" id="main-content">
<section class="page-section" id="main-content">
That’s better:
Let’s add some dummy paragraphs to the page to populate it some more, plus maybe a sub-head:
<!-- Main Content Section -->
                <section class="page-section" id="main-content">
                  <div class="container">
                    <div class="row justify-content-center">
                      <div class="col-lg-8 text-center">

                        <p>Lorem ipsum dolor sit amet, consectetur adipiscing elit...</p>

                        <p>Proin fermentum, felis tempor pharetra lobortis, magna quam hendrerit dolor...</p>

                        <h3>Subhead</h3>

                        <p>Lorem ipsum dolor sit amet, consectetur adipiscing elit...</p>

                      </div>
                    </div>
                  </div>
                </section>
<!-- Main Content Section -->
<section class="page-section" id="main-content">
<div class="container">
<div class="row justify-content-center">
<div class="col-lg-8 text-center">
<p>Lorem ipsum dolor sit amet, consectetur adipiscing elit...</p>
<p>Proin fermentum, felis tempor pharetra lobortis, magna quam hendrerit dolor...</p>
<h3>Subhead</h3>
<p>Lorem ipsum dolor sit amet, consectetur adipiscing elit...</p>
</div>
</div>
</div>
</section>
<!-- Main Content Section -->
<section class="page-section" id="main-content">
<div class="container">
<div class="row justify-content-center">
<div class="col-lg-8 text-center">
<p>Lorem ipsum dolor sit amet, consectetur adipiscing elit...</p>
<p>Proin fermentum, felis tempor pharetra lobortis, magna quam hendrerit dolor...</p>
<h3>Subhead</h3>
<p>Lorem ipsum dolor sit amet, consectetur adipiscing elit...</p>
</div>
</div>
</div>
</section>
Here’s what this looks like on the page:
If you don’t like the text to be centered then just remove the text-center class from one of the <div> tags.
If you want to put some more flair on these blocks of text, you can create new CSS classes (like before) and assign them to the paragraphs in the block. Or, you can have a peek into the current stylesheet and see what classes are already there for this purpose. Here are the ones we assigned to the <p> and <h3> tags:
<p class="lead text-muted">Lorem ipsum dolor sit amet...</p>

                <p class="text-muted">Proin fermentum, felis tempor pharetra lobortis, magna quam hendrerit dolor...</p>

                <h3 class="h3 mt-4">Subhead</h3>
<p class="lead text-muted">Lorem ipsum dolor sit amet...</p>
<p class="text-muted">Proin fermentum, felis tempor pharetra lobortis, magna quam hendrerit dolor...</p>
<h3 class="h3 mt-4">Subhead</h3>
<p class="lead text-muted">Lorem ipsum dolor sit amet...</p>
<p class="text-muted">Proin fermentum, felis tempor pharetra lobortis, magna quam hendrerit dolor...</p>
<h3 class="h3 mt-4">Subhead</h3>
And here’s the effect:
One more thing we’re going to do here is add an image somewhere on the page.
Here’s what an example image tag in HTML looks like:
<img src="image.jpg">
<img src="image.jpg">
<img src="image.jpg">
Fairly simple, right? The only parameter there is the path to the image file. To keep things nicely organized, you can put your image in the img directory again (just like you did with that background a while ago). In such a case, the image tag will be:
<img src="img/image.jpg">
<img src="img/image.jpg">
<img src="img/image.jpg">
That being said, the image tag in this particular configuration is fairly limited. To make it a bit more refined, let’s assign some Bootstrap classes to it. Particularly:
<img src="img/image"class="rounded img-fluid">
<img src="img/image" class="rounded img-fluid">
<img src="img/image" class="rounded img-fluid">
These two classes will give your image rounded corners and will also make sure that the size of the image doesn’t exceed the size of the block where it sits.
You can now add a tag like this somewhere in the main content section of your about page. For example, here:
<p class="lead text-muted">Lorem ipsum dolor sit amet...</p>
<p class="text-muted">Proin fermentum, felis tempor pharetra lobortis, magna quam hendrerit dolor...</p>
<h3 class="h3 mt-4">Subhead</h3>
<p class="lead text-muted">Lorem ipsum dolor sit amet...</p>

                <img src="img/image.jpg" class="rounded img-fluid">

                <p class="text-muted">Proin fermentum, felis tempor pharetra lobortis, magna quam hendrerit dolor...</p>

                <h3 class="h3 mt-4">Subhead</h3>
<p class="lead text-muted">Lorem ipsum dolor sit amet...</p>
<img src="img/image.jpg" class="rounded img-fluid">
<p class="text-muted">Proin fermentum, felis tempor pharetra lobortis, magna quam hendrerit dolor...</p>
<h3 class="h3 mt-4">Subhead</h3>
And here’s the final effect on the page:
Here’s our about page in all its glory:
3. Link to the New Page
With the new page done, let’s now link it from the homepage (the index.html file). Naturally, the best place to add this link is in the navigation menu (below <!-- Navigation -->).
This is something we haven’t talked about yet, but the <a> tag is a link tag in HTML. Using it, you can link to any web page by providing the address of that page in the href parameter. The text of the link – the clickable part of the link – will be the text between the opening and closing <a></a> tags.
When you refresh the homepage now, you’ll see your new link pointing to the about page.
Further Reading
At this stage, you’ve basically built yourself a simple website consisting of two pages – a homepage and an about page.
What you should do now is rinse and repeat by creating new pages, tuning them up, adding content to them, and then linking everything from the navigation menu.
Other things worth doing as you’re going through these steps is further learning HTML and CSS principles, going through the checklist, and also learning Bootstrap and its structures and classes. Some resources for that: